How to Grill on an Electric Grill: Your Complete Beginner's Guide

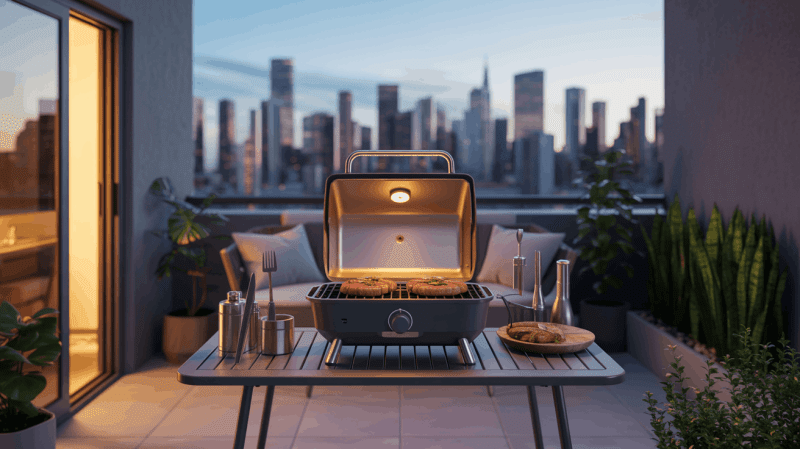
Imagine bringing the joy of outdoor grilling into your kitchen or onto your apartment balcony without dealing with propane tanks, charcoal mess, or billowing smoke. That's the beauty of electric grill grilling. These innovative appliances have transformed how people cook, making delicious grilled food accessible to everyone, regardless of living situation or experience level.
Electric grills offer remarkable convenience. They heat up quickly, maintain consistent temperatures, and produce minimal smoke compared to traditional charcoal or gas grills. Whether you live in an apartment with outdoor cooking restrictions, want to grill year-round regardless of weather, or simply prefer the simplicity of plugging in and cooking, an electric grill opens up a world of possibilities.
This comprehensive guide will walk you through everything you need to know to become confident with your electric grill. From choosing the right location and preparing your grill to mastering temperature control and achieving those perfect grill marks, you'll learn practical techniques that deliver consistently delicious results. Let's transform you from a hesitant beginner into a confident electric grill master.
New to electric grills? If you're still researching which model suits your needs, our experts have tested dozens of options. Check out our comprehensive guide to the best electric grills to find your perfect match before diving into these techniques.
Understanding Electric Grill Basics

Before you start cooking, it helps to understand how your electric grill actually works. Unlike gas grills that use flame or charcoal grills that burn briquettes, electric grills use powerful heating elements to generate heat. These elements sit beneath the cooking surface and transfer heat directly to the grill grates, which then sear your food.
Most electric grills operate between two hundred and six hundred degrees Fahrenheit. Some high-powered models can reach temperatures up to seven hundred degrees, rivaling traditional outdoor grills. The heating elements maintain steady temperatures through electric power, eliminating the temperature fluctuations common with charcoal or gas grills.
Electric grills come in two main designs. Open grills feature exposed grates similar to traditional outdoor grills, giving you that classic grilling experience with visible grill marks. Contact grills have cooking plates on both top and bottom, pressing food between heated surfaces for faster cooking times. Some versatile models let you use them in either configuration.
Indoor Electric Grills
Indoor models prioritize smoke reduction through specialized drip trays, fans, and lid designs that capture grease before it burns. These compact units typically sit on countertops and plug into standard outlets. They're perfect for apartments, condos, or anyone wanting to grill regardless of outdoor space or weather conditions.
Outdoor Electric Grills
Outdoor electric grills feature weather-resistant components and often larger cooking surfaces. They may produce more smoke than indoor models since ventilation isn't as critical. Many come with stands or wheels for patio use. They still require electrical outlets, so placement depends on power access.
Understanding your specific grill's power output helps you predict performance. A fifteen hundred watt electric grill will heat quickly and maintain high temperatures well. Lower wattage models around one thousand watts may take longer to preheat and struggle to sear as effectively, but they work fine for vegetables and slower cooking methods.
The cooking area matters too. Most electric grills offer between one hundred and three hundred square inches of space. Plan for about seventy-two square inches per person when cooking for groups. A grill with one hundred eighty square inches comfortably feeds two to three people, while models with two hundred fifty square inches or more can handle four to five servings.
Getting Started: Essential Setup Steps

Choosing the Right Location
Location selection sets you up for grilling success. For indoor electric grilling, pick a spot with excellent ventilation. Position your grill near a window you can open or beneath a range hood if possible. Even smokeless electric grills produce some cooking vapors, and proper airflow prevents odors from lingering in your kitchen.
Keep your electric grill at least twelve inches away from walls, cabinets, and other surfaces. The exterior gets warm during cooking, and this clearance prevents heat damage. Place the grill on a heat-resistant, level surface like a granite countertop or dedicated heat-proof mat. Avoid using your electric grill on wooden surfaces or near curtains.
For outdoor use on patios or balconies, ensure your grill stays protected from direct rain exposure. While outdoor-rated electric grills resist weather better than indoor models, prolonged moisture exposure damages electrical components. Set up under a covered patio area or use a waterproof grill cover when not cooking. Always verify your location provides easy access to a properly grounded outdoor electrical outlet.

Initial Assembly and Preparation
Most electric grills require minimal assembly right out of the box. Follow your manufacturer's instructions carefully, typically involving attaching legs or stands, inserting drip trays, and positioning grill grates. Check that all components fit securely before plugging in your grill for the first time.
Before your first cook, thoroughly clean all food-contact surfaces. Wash removable grates and drip trays with warm soapy water, rinse well, and dry completely. Wipe down the interior cooking chamber with a damp cloth to remove any manufacturing residue or packaging dust.
Seasoning your electric grill creates a protective layer on the grates and enhances nonstick properties. Coat the grill grates lightly with cooking oil using a paper towel. Heat the grill to medium-high temperature for about fifteen to twenty minutes. This initial heating burns off any remaining manufacturing oils and prepares the surface for cooking. Your kitchen may experience some smoke or odors during this first heating cycle, which is completely normal.
Quick Setup Checklist
- Verify adequate ventilation in your chosen location
- Ensure twelve-inch clearance from walls and combustibles
- Place grill on stable, heat-resistant surface
- Check electrical outlet is properly grounded
- Wash all removable parts before first use
- Season grates with cooking oil and preheat
- Read manufacturer's manual for model-specific guidance
Safety Considerations
Electric grills are safer than gas or charcoal grills, but basic precautions help ensure worry-free cooking. Never use extension cords unless specifically rated for outdoor use with a minimum fifteen-amp capacity. Inadequate extension cords overheat and create fire hazards. If an extension cord is necessary, keep it as short as possible and ensure it's designed for the power load.
Keep the power cord away from the hot cooking surface. Route cords behind or to the side of the grill where they won't contact heated areas. Unplug your electric grill by grasping the plug itself, not yanking the cord. After cooking, allow the grill to cool completely before unplugging and storing.
Even though electric grills produce less smoke than traditional grills, they still create cooking fumes. Never use any grill, including electric models, in completely enclosed spaces without ventilation. Carbon monoxide isn't a concern with electric grills like it is with gas or charcoal, but cooking smoke and grease vapors require adequate airflow.
Preheating Is Key to Grilling Success

Preheating your electric grill might seem like an unnecessary step when you're eager to start cooking, but this simple practice makes the difference between mediocre and exceptional results. Proper preheating ensures your grill grates reach the temperature needed to create beautiful sear marks, develop flavor through the Maillard reaction, and prevent food from sticking.
Electric grills typically require fifteen to twenty minutes to reach optimal cooking temperature. This timing varies based on your grill's wattage and your target temperature setting. High-powered grills with eighteen hundred watts or more heat faster than models with twelve hundred watts. Plan your prep work around preheating time so ingredients are ready when your grill reaches temperature.
How to Properly Preheat Your Electric Grill
Start by closing the lid if your electric grill has one. Closed lids trap heat and accelerate preheating. Turn your temperature dial or digital control to your desired setting. For most grilling applications, medium-high heat around four hundred fifty to five hundred degrees Fahrenheit works well. Let the grill heat undisturbed during the entire preheat period.
Many electric grills include indicator lights that signal when preheating completes. A red light often means the grill is heating, switching to green when ready. Models without indicator lights require you to time the preheat manually or use an infrared thermometer to verify surface temperature. Point the thermometer at the grill grates from about six inches away to get an accurate reading.

Temperature consistency across the cooking surface matters. After preheating, check several spots on your grill grates with an infrared thermometer. Some electric grills develop hot spots where heating elements concentrate more heat. Knowing your grill's heat distribution helps you position food strategically, placing thicker cuts over hotter zones and delicate items over cooler areas.
Why Skipping Preheat Ruins Your Food
Placing food on cold or insufficiently heated grill grates causes multiple problems. Cold grates don't sear protein surfaces quickly enough, allowing juices to escape before a crust forms. This results in dry, tough meat instead of juicy, flavorful results. Vegetables placed on inadequately heated grates steam rather than caramelize, producing limp, bland outcomes instead of charred, sweet flavors.
Food sticks tenaciously to grates that haven't reached proper temperature. Proteins bond with metal surfaces when heat isn't sufficient to quickly sear and release. Even nonstick grill plates perform poorly without adequate preheating. The frustration of shredded chicken breasts or fish fillets falling apart as you try to flip them usually traces back to inadequate preheating.

Preheating Benefits You'll Notice
- Deep, defined grill marks that look professionally prepared
- Caramelized crust that locks in juices and creates flavor complexity
- Food releases easily from grates without tearing or sticking
- Consistent cooking times that match recipe instructions
- Better texture with proper char on exterior and moist interior
- Enhanced smoky flavor from proper searing reactions
Pro Tip: Download our free Electric Grill Temperature & Timing Reference Chart to keep perfect cooking temperatures and preheat times at your fingertips. This printable guide includes settings for every type of food you'll grill.
Special Preheating Techniques
For maximum searing power when cooking steaks or burgers, preheat your electric grill five minutes longer than usual at the highest temperature setting. This extra heating time drives grate temperature even higher, giving you restaurant-quality char. Reduce to your target cooking temperature just before adding food.
When grilling delicate items like fish or thin vegetables, preheat to a slightly lower temperature around three hundred fifty degrees. This gentler heat prevents burning while still providing enough energy for caramelization. Fish benefits from this approach because high heat can cause delicate flesh to stick and tear.
Cold weather affects preheating time for outdoor electric grills. In temperatures below fifty degrees Fahrenheit, add five to ten extra minutes to your preheat time. Wind also steals heat, so position your grill in a sheltered spot when possible. Some grillers place a windbreak around their electric grill to maintain consistent temperatures on breezy days.
Mastering Essential Grilling Techniques

Direct Heat vs. Indirect Heat Cooking
Understanding heat zones transforms your electric grill from a simple cooking appliance into a versatile outdoor kitchen tool. Direct heat cooking places food directly over the heating element where temperatures are highest. This method works perfectly for foods that cook quickly and benefit from intense searing—think steaks, burgers, hot dogs, thin chicken breasts, and most vegetables.
Indirect heat cooking positions food away from the main heat source or uses lower temperature settings. While traditional charcoal or gas grills create indirect zones by leaving one burner off, electric grills achieve similar results differently. If your electric grill has dual heating zones, you can set one zone to high heat and another to low or medium heat. This creates a hot zone for searing and a cooler zone for finishing.
Single-zone electric grills can still accomplish indirect cooking by adjusting temperature mid-cook. Start by searing food over high heat to develop color and flavor, then reduce the temperature setting to allow food to cook through gently without burning. This technique works exceptionally well for thicker cuts like pork chops or chicken thighs that need time to reach safe internal temperatures.

The indirect method also proves valuable when grilling foods that release a lot of fat. By cooking at lower temperatures after initial searing, you reduce smoke production from dripping grease. This matters especially for indoor electric grilling where excessive smoke can trigger fire alarms or leave lingering odors.
Temperature Control for Different Foods
Different foods require different heat levels to reach their delicious potential. Learning which temperature setting suits each ingredient ensures perfectly cooked results every time. Your electric grill's temperature range typically spans from two hundred to six hundred degrees Fahrenheit, giving you plenty of control.
High Heat (450-600°F)

- Steaks (1-1.5 inches thick)
- Burgers and lamb chops
- Thin fish steaks like tuna or swordfish
- Quick-searing vegetables like asparagus
- Pizza when using grill as pizza oven
High heat creates the Maillard reaction that browns proteins and develops complex flavors. Use this setting when you want dramatic grill marks and a caramelized crust in minimal time.
Medium-High Heat (375-450°F)

- Boneless chicken breasts and thighs
- Pork chops and tenderloin
- Sausages and hot dogs
- Thick fish fillets like salmon
- Bell peppers and onions
- Corn on the cob
This versatile range handles most everyday grilling tasks. Foods cook through completely while developing attractive color without burning. This setting balances speed with control.
Medium Heat (325-375°F)

- Bone-in chicken pieces
- Thick pork chops over 1 inch
- Delicate fish like tilapia or cod
- Vegetables like zucchini and eggplant
- Fruits for grilling like peaches or pineapple
Medium heat provides gentle cooking that prevents exteriors from burning before interiors cook through. Perfect for foods that need more time or have delicate textures.
Low Heat (200-325°F)

- Warming cooked food before serving
- Slow-cooking ribs or brisket
- Melting cheese on burgers
- Toasting buns
- Keeping food warm while grilling other items
Low settings provide the control needed for finishing touches without overcooking. Use this zone as a holding area for food that finishes before others.
Cooking Time Guidelines and Using a Thermometer
Cooking times vary based on food thickness, starting temperature, and your specific electric grill's performance. These guidelines provide starting points, but a meat thermometer gives you certainty. Insert an instant-read thermometer into the thickest part of meat, avoiding bone or fat, to check doneness accurately.
| Food Item | Temperature Setting | Approximate Time | Target Internal Temp |
| Burger (¾ inch thick) | High (500°F) | 8-10 minutes | 160°F |
| Steak (1 inch thick) | High (550°F) | 6-8 minutes | 145°F (medium) |
| Chicken Breast (boneless) | Medium-High (425°F) | 12-15 minutes | 165°F |
| Chicken Thighs (bone-in) | Medium (375°F) | 20-25 minutes | 175°F |
| Pork Chops (1 inch) | Medium-High (400°F) | 10-12 minutes | 145°F |
| Salmon Fillet (1 inch) | Medium-High (425°F) | 8-10 minutes | 145°F |
| Hot Dogs | Medium-High (400°F) | 5-7 minutes | 165°F |
| Vegetables (sliced) | Medium (350°F) | 6-8 minutes | Tender |

Remember that food continues cooking after removal from the grill due to carryover heat. Large cuts like steaks rise five to ten degrees during resting. Remove steaks from your electric grill when they're five degrees below your target temperature to account for this. Chicken and pork should reach their final temperature on the grill since undercooking poses food safety risks.
Invest in a quality instant-read thermometer or, even better, a probe thermometer that monitors temperature continuously. Some advanced electric grills include built-in probe thermometers that alert you when food reaches target temperature. This technology removes guesswork and prevents both undercooking and overcooking.
Achieving Perfect Grill Marks
Those distinctive crisscross grill marks aren't just aesthetically pleasing—they indicate proper searing technique and add flavor through caramelization. Creating professional-looking marks on your electric grill requires technique, but anyone can master it with practice.
Start with a thoroughly preheated grill and clean, dry food. Pat proteins with paper towels to remove surface moisture, which creates steam that prevents searing. Place your food on the grill at a forty-five degree angle to the grate lines. Leave it completely undisturbed for about three to four minutes, depending on thickness and desired char level.

Resist the urge to peek or move food during this initial searing period. The marks form as proteins and sugars caramelize against hot grill grates. Moving food prematurely prevents this reaction and creates incomplete, faint marks. When the first marks are well-defined, rotate the food ninety degrees (still on the same side) and cook another three to four minutes. This creates the classic diamond crosshatch pattern.
Flip only once for most foods. After creating your crosshatch on the first side, turn the food over and repeat the process: forty-five degree angle, wait, rotate ninety degrees, wait. Flipping food repeatedly disrupts the searing process and extends cooking time unnecessarily. The exception is very thick cuts that need longer cooking, which may benefit from multiple turns to cook evenly.
Grill marks appear most dramatically on foods with natural sugars or proteins—meats, fish, and vegetables. Lean proteins like chicken breast mark more subtly than fattier cuts. Marinating or applying oil helps develop more pronounced marks by providing surface moisture that caramelizes. A light brush of oil just before grilling enhances marking without adding excessive calories.
Expert Tips for Electric Grilling Success

Oil the Grates or the Food, Not Both
Preventing food from sticking starts with proper lubrication, but too much oil creates problems. Choose one method: oil your grill grates before preheating, or oil your food just before grilling. Oiling both creates excessive grease that causes flare-ups and smoke, especially on indoor electric grills.
To oil grates, fold a paper towel into a small pad, grip it with tongs, dip it in cooking oil, and wipe the grate surfaces before preheating. Use high smoke point oils like vegetable, canola, or grapeseed oil. Avoid olive oil, which smokes at relatively low temperatures. The heat polymerizes the oil into a slick coating that food releases from easily.
Alternatively, brush or spray food lightly with oil before placing it on dry, preheated grates. This method works especially well for vegetables and lean proteins like chicken breast. The thin oil coating promotes browning and prevents sticking while contributing minimal smoke. For fish, oiling the food rather than the grates reduces the chance of delicate flesh tearing.
Don't Overcrowd Your Cooking Space
The temptation to fill every inch of grill space is strong, especially when cooking for a group. Resist this urge. Overcrowding traps steam around food, preventing proper searing and creating a braising effect rather than grilling. Leave at least one inch of space between items on your electric grill.

Adequate spacing allows hot air to circulate around each piece, promoting even cooking and browning. It also gives you room to maneuver tools without bumping other items. When you need to cook large quantities, work in batches. Most electric grills heat up quickly enough that cooking in waves doesn't significantly extend total cooking time.
For items that cook at different rates, group similar foods together. Grill all your chicken breasts in one batch, then vegetables in another. This prevents undercooked chicken from sitting too long at unsafe temperatures while you finish slower-cooking items. Use your electric grill's lower-heat zones or warming settings to keep early batches hot while finishing later batches.
Use the Lid Effectively
If your electric grill features a lid, use it strategically to control cooking. Closing the lid traps heat like a convection oven, cooking food from all sides simultaneously. This speeds up cooking time and helps thicker cuts cook through without burning exteriors.
Keep the lid closed for bone-in chicken, thick pork chops, and any protein over one inch thick. The retained heat cooks interiors thoroughly while the grill grates continue searing the surface. Open the lid only to check doneness with a thermometer or to flip food.
Leave the lid open for thin, quick-cooking items like burgers, hot dogs, thin fish fillets, and most vegetables. These foods cook fast enough from grate contact alone, and open-lid grilling lets you monitor progress easily. Opening the lid also provides better control over browning, preventing foods from cooking too fast on the top surface.
Let Meat Rest After Grilling
Patience pays off after grilling. When you remove meat from your electric grill, resist cutting into it immediately. Resting allows juices that migrated to the center during cooking to redistribute throughout the meat. Cutting too soon causes these flavorful juices to spill onto your cutting board instead of staying in the meat.

Rest steaks and chops for five to ten minutes under loose foil. Larger roasts need fifteen to twenty minutes. Chicken breasts benefit from a five-minute rest. During this time, internal temperature continues rising slightly from carryover cooking. The muscle fibers relax, reabsorbing moisture for a juicier, more tender result.
Tent rested meat loosely with aluminum foil to retain heat without trapping steam. Wrapping too tightly creates condensation that softens crispy grilled crusts. Place rested meat on a warm plate or cutting board to prevent it from cooling too much. The few minutes of patience dramatically improve texture and taste.
Season Generously and in Stages
Grilling intensifies flavors but also causes some seasoning to fall through grates or burn off. Season more heavily than you think necessary. For simple preparations, kosher salt and freshly ground black pepper provide excellent results. Apply seasoning in two stages: once during prep and again just before grilling.
For steaks and chops, season forty-five minutes to one hour before grilling. This gives salt time to penetrate meat and enhance flavor throughout. Pat surfaces dry again before grilling if moisture accumulated. Apply a second light seasoning just before the food hits the grill to boost surface flavor.
Marinades add flavor and help tenderize tougher cuts, but excess marinade causes problems. Shake off or wipe away excess marinade before grilling. Too much liquid clinging to food prevents browning and creates excessive smoke as sugars in marinades burn. Reserve some unmarinated marinade for basting during the last few minutes of cooking.

Essential Electric Grill Accessories
A few quality tools make electric grilling easier and more enjoyable. These items solve common challenges and expand what you can cook.
- Instant-read meat thermometer for accurate doneness
- Long-handled tongs for safe food handling
- Silicone basting brush for applying marinades
- Grill brush for cleaning grates
- Heat-resistant gloves for adjusting hot components

Optional Upgrades Worth Considering
Once you've mastered basics, these accessories unlock new grilling techniques and make certain foods easier to prepare.
- Grill basket for small vegetables that fall through grates
- Cedar planks for infusing smoky flavor into fish
- Grill mat for delicate foods like eggs or thin fish
- Probe thermometer with remote monitoring
- Cast iron grill press for perfect burger smashing
Experiment with Smoke Flavor
Electric grills don't produce natural smoke like charcoal or wood-fired grills, but you can add smoky flavors easily. Wood chips provide authentic smoke when placed directly on heating elements or in a smoker box. Soak chips in water for thirty minutes, drain them, and place them on your electric grill during cooking.
Different wood types create distinct flavors. Hickory delivers strong, bacon-like smoke perfect for pork and beef. Apple and cherry woods offer milder, slightly sweet smoke that complements chicken and fish. Mesquite provides intense smoke suitable for short cooking times. Start with small amounts of wood chips—a handful is enough—to avoid overwhelming food with excessive smoke.
For indoor electric grilling where smoke isn't practical, liquid smoke offers an alternative. Add a few drops to marinades or brush a very diluted mixture onto food before grilling. Smoked paprika and other smoked spices in rubs also contribute barbecue flavor without actual smoke. These workarounds help bridge the flavor gap between electric and traditional grilling.
Cleaning and Maintenance Made Simple

Immediate Post-Cooking Cleaning
Cleaning your electric grill while it's still warm makes the job dramatically easier. After removing food, turn the heat to high for five to ten minutes. This final blast burns off stuck-on food particles and grease, reducing them to ash. Once this cleaning cycle completes, turn off the grill and let it cool for about fifteen minutes until it's warm but safe to handle.
Use a quality grill brush to scrub grates while they're still warm. Brass or stainless steel bristle brushes work well on most surfaces. Scrub with the grain of the grates, applying firm pressure to dislodge carbonized food. For stubborn spots, wrap the brush in a damp cloth and scrub again. The combination of heat, moisture, and mechanical action removes most residue.
Empty and clean the drip tray after every cooking session. Accumulated grease in drip trays creates fire hazards and unpleasant odors during your next cook. Most electric grill drip trays are dishwasher-safe, making this step effortless. If hand washing, use hot soapy water and a scrub sponge to remove all grease and food particles.

Deep Cleaning Your Electric Grill
Once every month, or more frequently if you grill often, perform a thorough deep clean. Unplug the grill and allow it to cool completely. Remove all detachable components—grates, drip trays, heat deflectors, and any other removable parts. Wash these in hot soapy water or run them through your dishwasher if they're dishwasher-safe.
For cast iron grates, avoid soap and harsh scrubbing that removes seasoning. Instead, scrub cast iron with a stiff brush and hot water only, then dry immediately and apply a light coating of cooking oil to prevent rust. Nonstick grates can handle gentle dish soap but avoid abrasive scrubbers that damage the coating.
Wipe down the interior of your electric grill with a damp cloth or sponge. Never immerse the main housing in water or spray it directly with water, as this damages electrical components. Use a mild degreaser for stubborn interior buildup, ensuring you wipe away all cleaner residue before your next use.
Clean the heating element carefully, following your manufacturer's instructions. Most elements can be wiped gently with a damp cloth when completely cool. Never scrub heating elements aggressively or use abrasive cleaners that damage protective coatings. Some electric grills have removable heating elements that simplify this process.
Maintaining Your Grill for Longevity
Regular maintenance extends your electric grill's lifespan and ensures consistent performance. Inspect the power cord before each use for fraying, cuts, or damage. Damaged cords create serious electrical hazards and require immediate replacement. Most manufacturers sell replacement cords for their grills.
Check that all components fit together properly after cleaning. Loose or misaligned parts affect heating performance and create safety risks. Grates should sit flush against heat deflectors, and drip trays should fit securely in their designated positions. Tighten any loose screws or fasteners you notice during inspections.

Store your electric grill properly when not in use. For outdoor models, invest in a fitted waterproof cover that protects against rain, sun, and debris. Even weather-resistant grills last longer with cover protection. Indoor electric grills should be stored in dry locations away from excessive humidity that can corrode electrical components over time.
Season your grill grates periodically to maintain nonstick properties. Every few months, coat clean grates lightly with cooking oil and heat the grill to medium-high for fifteen minutes. This process builds up the seasoning layer that prevents sticking and rust. Nonstick coatings don't require seasoning but benefit from gentle handling that preserves their surface.
Cleaning Schedule Quick Reference
- After Every Use: Burn off residue at high heat, brush grates, empty drip tray
- Weekly (if used frequently): Wash removable parts in hot soapy water or dishwasher
- Monthly: Deep clean interior, inspect cord and connections, check all parts fit properly
- Quarterly: Season cast iron grates, inspect for rust or damage, test temperature accuracy
- Annually: Professional inspection if grill has complex electrical components or shows performance issues
Troubleshooting Common Issues
Even well-maintained electric grills occasionally develop problems. If your grill isn't heating properly, first verify the outlet is working by plugging in another device. Check that the temperature control dial is functioning and making good contact. Heating elements can wear out over time and may require replacement, especially if your grill is several years old.
Excessive smoking usually indicates grease buildup burning on heating elements or in the drip tray. Turn off the grill immediately, let it cool, and perform a thorough cleaning. Ensure drip trays are positioned correctly to catch all grease. Some foods naturally produce more smoke than others—fattier cuts like pork belly or heavily marinated items create more smoke than lean proteins.
If food consistently sticks despite proper preheating and oiling, your grill grates may need replacement. Nonstick coatings wear down with use, and cast iron can develop rust or lose its seasoning. Most electric grill manufacturers sell replacement grates that restore like-new performance. This investment is worth making before food sticking ruins your grilling experience entirely.
Your Journey to Electric Grill Mastery Begins Now

You now have all the knowledge needed to confidently grill delicious food on your electric grill. From understanding how these innovative appliances work to mastering temperature control, proper techniques, and maintenance routines, you're equipped to create restaurant-quality meals in the comfort of your home.
Remember that grilling is as much art as science. The guidelines in this comprehensive guide provide a solid foundation, but your personal preferences and experience will refine your technique over time. Don't be afraid to experiment with different foods, temperatures, and seasonings. Each grilling session teaches you something new about your specific electric grill's personality and performance.
Start with simpler foods like burgers, chicken breasts, and vegetables while you build confidence. As your skills grow, branch out to more challenging preparations like whole fish, thick steaks, or delicate items. The versatility of electric grills lets you cook year-round, regardless of the weather, enabling grilling techniques that would be impossible with traditional outdoor-only grills in cold months.
Keep your electric grill clean and well-maintained to ensure years of reliable service. Those few minutes of post-cooking care make all the difference between a grill that performs beautifully for years and one that becomes frustrating to use. Treat your electric grill as an investment in convenient, healthy cooking that brings people together over delicious food.
The path from beginner to confident griller is shorter than you think. With practice, preheating your grill will become automatic, knowing when to flip food will become intuitive, and achieving perfect grill marks will happen naturally. Trust the process, be patient with yourself, and most importantly, enjoy the experience of creating wonderful meals.
Join thousands of home cooks who receive our weekly grilling newsletter packed with recipes, techniques, and seasonal tips. Plus, get instant access to our exclusive Electric Grill Recipe Collection featuring 25 tested recipes specifically designed for electric grills.
Fire up that electric grill and start creating memories. Whether you're feeding family on a weeknight or hosting friends for a weekend cookout, you now possess the skills to make every grilling session successful. Happy grilling!
DISCLAIMER
This document is provided for general information purposes only and should not be relied upon as providing legal advice, technical, or specific operational guidance to the reader, whether as to the practices described in the document or the applicable legal requirements and regulations. Out Door Grill Guide.com expressly disclaims any responsibility for liability arising from or related to the use or misuse of any information in this document.