Planning an Outdoor Kitchen: A Step-by-Step Checklist
Creating an outdoor kitchen transforms your backyard into a functional entertainment space where cooking, dining, and socializing blend seamlessly with the outdoors. But without proper planning, your dream project can quickly become overwhelming. This comprehensive checklist guides you through each crucial planning stage, helping you avoid costly mistakes and design an outdoor kitchen that perfectly suits your lifestyle, space, and budget.

1. Define Your Vision & Needs
Before diving into materials and appliances, take time to envision how you'll use your outdoor kitchen. Will it primarily serve your immediate family for casual meals, or do you plan to host large gatherings? Your intended use will significantly impact your design decisions.
Questions to Consider:
- How many people will typically use the space at once?
- What type of cooking do you enjoy (grilling, smoking, pizza making)?
- Will you use the kitchen year-round or seasonally?
- Do you need a fully functional kitchen or just a cooking station?
- How will the kitchen integrate with existing outdoor living spaces?
Create a vision board collecting images of outdoor kitchens you admire. This visual reference will help communicate your preferences to designers or contractors later in the process.

2. Set a Realistic Budget
Outdoor kitchens can range from simple grill stations costing a few thousand dollars to elaborate outdoor living spaces exceeding $50,000. Establishing a clear budget early helps guide all subsequent decisions and prevents costly mid-project changes.
Budget Breakdown by Component:
| Component | Percentage of Budget | Cost Range |
| Appliances (Grill, Refrigerator, etc.) | 30-40% | $1,000-$15,000+ |
| Countertops & Surfaces | 15-20% | $500-$5,000+ |
| Cabinetry & Storage | 10-15% | $500-$7,000+ |
| Utilities (Gas, Electric, Water) | 15-20% | $1,000-$5,000+ |
| Labor & Installation | 20-30% | $1,500-$10,000+ |
| Contingency Fund | 10-15% | Varies |
A general rule of thumb is to spend no more than 10-15% of your home's value on your outdoor kitchen project to ensure a good return on investment.
Plan Your Budget With Confidence
Our interactive budget calculator helps you estimate costs based on your specific needs and preferences.
Download Budget Calculator3. Choose the Perfect Location
The location of your outdoor kitchen significantly impacts its functionality, convenience, and how often you'll use it. Consider these key factors when determining the ideal spot on your property.
Proximity Considerations
- Distance to indoor kitchen: Closer proximity makes transporting food and supplies easier.
- Access to utilities: Consider the cost of extending gas, water, and electrical lines.
- Relationship to dining/living areas: The cook shouldn't feel isolated from guests.
- View from the house: Choose a location that enhances your property's aesthetics.
Environmental Factors
- Wind patterns: Avoid smoke blowing toward seating areas or into the house.
- Sun exposure: Consider shade during peak cooking hours.
- Privacy from neighbors: Position for comfort and conversation.
- Drainage: Ensure the area doesn't collect water during rain.

Pro Tip: Spend time in your yard at different times of day before finalizing your kitchen location. Note sun patterns, wind direction, and how the space feels during the hours you're most likely to use it.
4. Design the Layout & Workflow
An efficient layout ensures cooking is enjoyable rather than frustrating. The classic indoor kitchen "work triangle" concept can be adapted for outdoor spaces, with zones for preparation, cooking, and serving.
Popular Outdoor Kitchen Layouts:
Linear/Straight Line

Best for: Limited space, along walls or fences
Features: All elements in a single row, efficient for one cook
L-Shaped

Best for: Corner spaces, creating defined cooking zones
Features: Creates natural work triangle, separates cooking from prep
Island/U-Shaped

Best for: Larger spaces, multiple cooks, entertaining
Features: Maximum counter space, allows for bar seating, social cooking
Functional Zones to Include:
- Hot Zone: Grills, smokers, pizza ovens, side burners
- Cold Zone: Refrigerators, ice makers, coolers
- Wet Zone: Sinks, beverage stations, ice bins
- Dry Zone: Prep counters, cutting boards, storage
- Serving/Dining Zone: Bar seating, serving counters, dining tables
Allow at least 36 inches of counter space on either side of cooking appliances for safe, comfortable food preparation.
5. Select Appliances & Features
Appliances are the heart of your outdoor kitchen. Choose ones that match your cooking style and will withstand outdoor conditions. Start with essential items and add luxury features as budget allows.
Essential Appliances:
Cooking Equipment
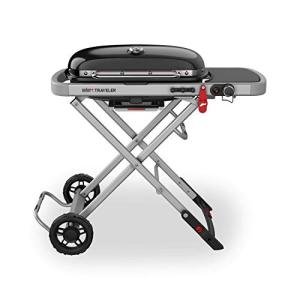
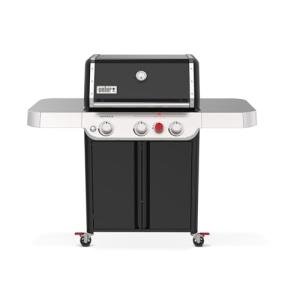
- Grill: Built-in or freestanding, gas, charcoal, or pellet
- Side Burners: For sauces, sides, and boiling
- Specialty Cookers: Smokers, pizza ovens, kamado grills
Refrigeration & Storage
- Outdoor Refrigerator: Weather-rated for temperature extremes
- Ice Maker: For beverages and food preservation
- Storage Drawers/Cabinets: For utensils and supplies

Additional Features to Consider:
- Sink: For food prep and cleanup (requires plumbing)
- Countertops: Durable materials like granite, concrete, or porcelain
- Lighting: Task, ambient, and accent lighting for evening use
- Ventilation: Hood or pergola system for smoke management
- Entertainment: Weather-resistant speakers, TV mounting areas
- Heating Elements: Fire features, patio heaters for extended seasons
Important: Always choose appliances specifically rated for outdoor use. Indoor appliances can be dangerous and will deteriorate quickly when exposed to the elements.
6. Plan for Utilities & Infrastructure
Proper utility planning is crucial for a functional outdoor kitchen. These systems should be designed and installed by qualified professionals to ensure safety and code compliance.
Electrical Requirements
- Dedicated 20-amp GFCI circuits for appliances
- Weather-resistant outlets and covers
- Proper lighting circuits
- Consider future expansion needs
Gas Connections
- Natural gas line extension or propane setup
- Proper sizing for all appliances
- Accessible shutoff valves
- Leak detection systems for safety
Water & Drainage
- Hot and cold water lines
- Proper drainage system
- Winterizing capabilities
- Backflow prevention devices

Get Expert Utility Planning
Our specialists can help design the optimal utility layout for your outdoor kitchen, ensuring safety and functionality.
Request Utility Consultation7. Navigate Permits & Regulations
Building an outdoor kitchen typically requires permits and must comply with local building codes. Skipping this step can result in fines, forced removal, or complications when selling your home.
Common Permit Requirements:
- Building Permits: For permanent structures and foundations
- Electrical Permits: For any new electrical work
- Plumbing Permits: For water lines and drainage
- Gas Permits: For natural gas or propane lines
- Zoning Approvals: For compliance with setbacks and property lines
Additional Regulations to Check:
- HOA Restrictions: Many homeowners associations have specific rules about outdoor structures
- Fire Codes: Regarding distance from structures and combustible materials
- Environmental Regulations: Particularly near waterways or protected areas
- Noise Ordinances: If your outdoor kitchen will include entertainment features

Tip: Schedule a pre-planning meeting with your local building department to understand all requirements before finalizing your design. This can save significant time and prevent costly redesigns.
8. Finalize Plans & Hire Professionals
With your vision, budget, and requirements defined, it's time to finalize plans and determine whether to DIY or hire professionals. Most outdoor kitchens require a mix of DIY work and professional assistance.
When to DIY vs. Hire Professionals:
| Project Component | DIY Potential | Professional Recommended | Why |
| Design & Planning | Moderate | For complex projects | Designers ensure efficient workflow and code compliance |
| Foundation & Structure | Low to Moderate | Yes | Requires proper load calculations and construction knowledge |
| Gas Lines | Not Recommended | Always | Safety concerns and code requirements |
| Electrical Work | Not Recommended | Always | Safety concerns and code requirements |
| Plumbing | Low | Yes | Requires proper drainage and winterization |
| Countertops | Low to Moderate | Usually | Heavy materials require precise installation |
| Appliance Installation | Moderate | For built-ins | Ensures proper ventilation and connections |
| Finishing Work | High | Optional | Cosmetic elements can often be DIY |
Finding Qualified Professionals:
- Check credentials: Licenses, insurance, and outdoor kitchen experience
- Review portfolios: Look for projects similar to your vision
- Request references: Speak with past clients about their experience
- Get multiple bids: Compare at least three detailed quotes
- Verify timeline: Understand the projected completion schedule

9. Select Durable Materials
Outdoor kitchens face harsh conditions including temperature fluctuations, moisture, UV exposure, and more. Choosing appropriate materials ensures longevity and reduces maintenance.
Countertops
- Granite: Durable, heat-resistant, many color options
- Concrete: Customizable, modern look, requires sealing
- Porcelain: Low maintenance, UV resistant, non-porous
- Quartzite: Natural stone, durable, heat resistant

Cabinetry
- Stainless Steel: Weather-resistant, durable, modern look
- Marine-Grade Polymer: Won't rot, fade, or delaminate
- Masonry: Stone or brick, extremely durable
- Teak: Natural wood option, requires maintenance

Flooring
- Concrete Pavers: Durable, many styles, good drainage
- Porcelain Tile: Low maintenance, slip-resistant options
- Natural Stone: Beautiful, durable, higher cost
- Composite Decking: Low maintenance, wood alternative

When selecting materials, prioritize durability and weather resistance over aesthetics. Even the most beautiful outdoor kitchen will disappoint if it deteriorates after a few seasons.
10. Plan for Weather Protection
To maximize the usability of your outdoor kitchen throughout the year, consider how to protect it from various weather conditions. The right coverage can extend your outdoor cooking season by months.
Coverage Options:
- Pergolas: Partial shade, can add retractable canopies
- Pavilions: Permanent roof structures, maximum protection
- Umbrellas: Affordable, flexible, limited coverage
- Retractable Awnings: Adjustable coverage as needed
- Louvered Roof Systems: Adjustable slats for sun/rain control

Climate Considerations:
Hot Climates
- Prioritize shade structures
- Consider outdoor fans
- Choose heat-resistant materials
- Plan for refrigeration needs
Cold Climates
- Include heating elements
- Plan for winterization
- Consider wind barriers
- Choose freeze-resistant plumbing
11. Develop a Maintenance Plan
A well-maintained outdoor kitchen will last longer and perform better. Create a maintenance schedule based on your materials, appliances, and local climate conditions.
Seasonal Maintenance Checklist:
Spring
- Deep clean all surfaces
- Check gas connections
- Inspect electrical components
- Test refrigeration
- Clean and calibrate grill
- Reseal countertops if needed
Summer
- Regular cleaning after use
- Check for insect infestations
- Monitor drainage systems
- Clean refrigerator coils
- Inspect for UV damage
- Check lighting systems
Fall
- Clean gutters above kitchen
- Check weatherstripping
- Inspect covers and canopies
- Clean vents and exhausts
- Touch up finishes
- Prepare for winter storage
Important: In freezing climates, properly winterize water lines to prevent burst pipes. Drain all water systems, apply antifreeze where appropriate, and shut off water supply to the outdoor kitchen.
12. Final Review Before Construction
Before breaking ground or placing orders, conduct a comprehensive review of your plans. This final check can prevent costly mistakes and ensure your outdoor kitchen meets all your needs.
Final Checklist:
- Review all design plans and measurements for accuracy
- Confirm budget allocations for each component
- Verify all required permits have been obtained
- Check that utility plans meet code requirements
- Ensure material selections are appropriate for your climate
- Confirm appliance specifications and installation requirements
- Review contractor agreements and timelines
- Create a contingency plan for unexpected issues
- Schedule deliveries and installation in logical sequence
- Plan for alternative cooking arrangements during construction

Ready to Create Your Dream Outdoor Kitchen?
Planning an outdoor kitchen requires careful consideration of numerous factors, from practical concerns like budget and utilities to design elements that make the space uniquely yours. By following this comprehensive checklist, you've laid the groundwork for a successful project that will enhance your home and lifestyle for years to come.
Remember that proper planning is the most important ingredient in any successful outdoor kitchen. Take your time with each step, consult professionals when needed, and don't rush the process. The result will be an outdoor cooking and entertaining space that brings joy to your family and adds value to your home.
Get Expert Help With Your Outdoor Kitchen Project
Our team of outdoor kitchen specialists can help you navigate the planning process, avoid common pitfalls, and create the perfect outdoor cooking space for your needs and budget.
Schedule Your Free Consultation
DISCLAIMER
This document is provided for general information purposes only and should not be relied upon as providing legal advice, technical, or specific operational guidance to the reader, whether as to the practices described in the document or the applicable legal requirements and regulations. Backyard Grilling Pros expressly disclaims any responsibility for liability arising from or related to the use or misuse of any information in this document.