Rotisserie Grilled Duck: Master the Technique

Welcome to your ultimate guide for creating an unforgettable centerpiece meal. We're going to explore the art of preparing duck on a rotisserie. This method transforms this rich poultry into something truly spectacular.
Duck makes a fantastic holiday showstopper or a delicious alternative to everyday chicken. Its deep flavor and luxurious texture deserve a cooking technique that highlights its best qualities.
The rotisserie is superior for roasting poultry. The constant, slow rotation ensures every part cooks evenly. This gentle motion lets fat render perfectly while keeping the meat incredibly juicy. The result is skin so crispy it shatters.
This guide breaks down the entire process into clear, achievable steps. You'll learn the essential rotisserie grilling techniques that guarantee success. Get ready to prepare what might become your new best duck rotisserie recipe for any special gathering.
Key Takeaways
- Duck is an impressive and flavorful centerpiece, perfect for holidays or special dinners.
- The rotisserie method provides more even cooking than a standard oven.
- Slow rotation helps render fat effectively for exceptionally crispy skin.
- This technique locks in moisture, resulting in tender, juicy meat.
- Mastering this process creates a show-stopping meal that rivals restaurant quality.
- It's a fantastic alternative to traditional roasted chicken for a unique dining experience.
- With proper guidance, rotisserie-grilling duck is an achievable project for any home cook.
The Unbeatable Benefits of Rotisserie Duck
https://www.youtube.com/watch?v=V2bd6zA0wmQ
Rotisserie cooking is not just for chickens. It's a game-changer for duck, making it succulent and crispy. If you're hesitant to grill duck, the rotisserie is your secret. It turns duck into a spectacular dish.
This method has advantages that other ways can't match. Let's explore why the rotisserie is the best for duck. You'll learn all about it in this guide.
How Rotisserie Cooking Transforms Duck
The magic happens on the spit. As the duck rotates, its fat renders and bastes it. This self-basting is the key rotisserie duck cooking tip for amazing results.
The meat becomes moist and tender from inside out. Every side gets even heat, making the skin golden-brown and crispy. No need to flip or worry about hot spots!
Static roasting in an oven can't compare. In a pan, the duck sits still. The top browns well, but the sides and bottom often don't.
The rotisserie fixes this. It's an easy duck rotisserie method because it ensures even cooking and basting for you.
| Feature | Rotisserie Method | Static Roasting |
|---|---|---|
| Cooking Evenness | Perfectly even on all sides due to constant rotation. | Often uneven; top browns more than sides/bottom. |
| Skin Texture | Uniformly crispy and "beautifully browned" all over. | Can be patchy; some areas may be soft or greasy. |
| Meat Moisture | Exceptionally succulent and self-basted throughout. | Risk of drying out, specially in leaner sections. |
| Flavor Infusion | Juices and seasonings redistribute constantly. | Flavor tends to settle in the pan juices. |
| Chef's Effort | Set it and monitor; no need for manual turning. | Requires periodic basting and rotating the pan. |
What You Can Expect from This Guide
We've convinced you of the "why." Now, let's show you the "how." This guide is your complete roadmap to rotisserie duck success. It's designed to be easy and detailed for everyone.
First, we'll cover the right equipment. You'll learn about essential rotisserie hardware and how to pick the perfect duck. We'll also share key ingredients for seasoning and flavor.
Next, we'll break down the process into simple steps. You'll learn how to prep the duck, truss it, and set up your grill. We'll share crucial rotisserie duck cooking tips for each step.
Then, we'll dive into grill mastery. Managing heat is key for perfect cooking. We'll show you how to check for doneness and get that crispy skin finish. By the end, you'll be confident in your easy duck rotisserie method.
Our goal is to help you make a stunning, delicious rotisserie duck recipe for any gathering. Let's start your journey to becoming a rotisserie pro.
Gathering Your Equipment and Ingredients

For a perfect rotisserie duck, you need the right tools and top-notch ingredients. Getting these basics right is key to success.
Think of this as your pre-flight checklist. Once you have everything ready, the rotisserie grill technique becomes easy and fun.
Essential Rotisserie Hardware
You can't spin a duck without the right tools. Here is the non-negotiable gear you'll need to pull this off.
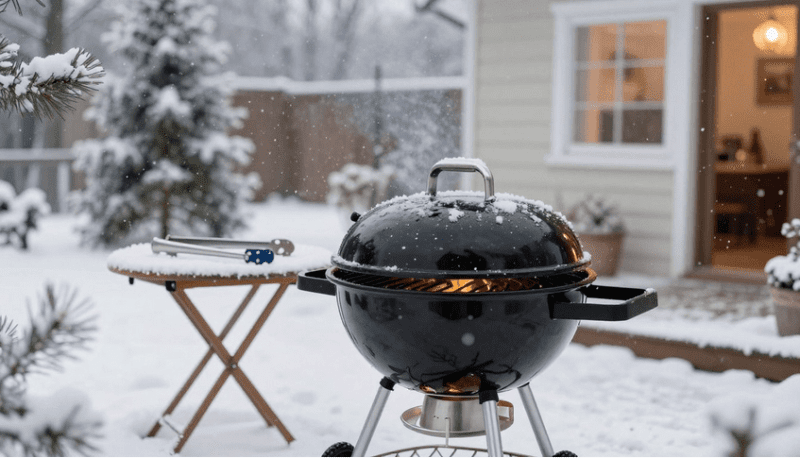
- A Grill with Rotisserie Capability: This can be a gas or charcoal model. The key is that it must have a rotisserie ring or a designated opening for the spit motor.
- The Rotisserie Spit and Motor Kit: This is the heart of the operation. It includes the long metal rod (spit), forks to secure the meat, and an electric motor that does the turning for you.
- Butcher's Twine (Not Nylon): Natural fiber twine is essential for trussing. It holds the bird's shape and won't melt under high heat.
- A Reliable Meat Thermometer: This is your most critical tool for perfect doneness. A good leave-in probe model, like the Inkbird IBT-4XS, lets you monitor the internal temperature without opening the grill.
- A Drip Pan or Foil Trays: Duck renders a lot of fat. Placing a pan underneath catches it, preventing flare-ups and making cleanup easy.
For charcoal grills, a mix like Big K lump with Weber briquettes provides a steady, long-lasting heat source perfect for cooking duck on a rotisserie.
Choosing a Rotisserie Kit for Your Grill
Not all kits fit all grills. Compatibility is everything. Most major brands like Weber offer specific kits for their models.
Third-party manufacturers like OnlyFire also make excellent universal kits, such as the OnlyFire BRK-6025 designed for Weber kettles. Before buying, double-check your grill's make, model, and diameter to ensure a secure fit.
The motor should have enough torque to turn a 6-7 pound bird smoothly. A little research here saves a lot of frustration later.
The Perfect Duck and Key Ingredients
With your hardware sorted, it's time for the star of the show. A high-quality duck, around 6 to 7 pounds, is ideal. Look for a plump bird with firm, creamy skin.
The seasoning is where you can express your style. You have two fantastic paths, both leading to delicious results.
The Simple, Savory Route: This method uses a binder like English mustard to help a classic BBQ rub adhere. The rub forms a flavorful, peppery crust as it cooks.
The Elegant, Asian-Inspired Route: This approach starts with a dry brine using coarse salt for seasoned meat and perfectly crisp skin. It's often finished with a glossy glaze, like a mix of honey, soy, and ginger-scallion paste.
Both methods are outstanding. Your choice depends on whether you want bold BBQ flavors or sweet, aromatic notes. This is the core of your rotisserie duck seasoning strategy.
Your Kitchen Prep Station
Before you handle the duck, set up a dedicated workspace. This "mise en place" keeps you organized and sanitary.
Lay out all your tools: twine, thermometer, sharp knives, and paper towels. Have your chosen seasonings—whether it's mustard and rub or salt and glaze components—measured and ready in small bowls.
Place a cutting board on a stable surface. Keep a trash bowl nearby for trimmings. This organized flow makes the prep steps fast and focused, so you can move to the grill with confidence.
With your equipment checked and your ingredients prepped, you're now ready to dive into the hands-on process of transforming that duck into a masterpiece.
How to Rotisserie Grill Duck: Step-by-Step Mastery
Mastering the rotisserie grill takes three key steps: preparation, mounting, and fire control. This guide breaks down each step into easy-to-follow actions. Follow it closely for a perfect cook every time.
Step 1: Prep the Duck – Trimming, Drying, and Seasoning
Great results start long before the duck hits the heat. Proper preparation is key to your perfect rotisserie duck recipe.
First, trim any large flaps of excess fat from the neck and cavity. This prevents flare-ups. Next, dry the skin thoroughly. Pat the entire bird dry inside and out with paper towels.
To get incredibly crispy skin, take it further. Place the duck on a rack over a baking sheet, uncovered, in your refrigerator for 8-24 hours. Some masters even air-dry it for two days with a light salt coating.
Now, for seasoning. You have several fantastic options, each creating a different flavor profile.
| Method | Ingredients | Best For | Application Tip |
|---|---|---|---|
| Dry Rub | BBQ rub, salt, pepper, herbs | Classic smoky flavor | Rub generously over the entire bird, including under the skin. |
| Wet Paste | Mustard, oil, garlic, spices | Deep, adhered seasoning | Coat the duck evenly. The paste helps the rub stick and adds moisture. |
| Glaze | Honey, soy sauce, citrus, hoisin | Sweet & sticky finish | Apply during the last 30 minutes of cooking to avoid burning. |
After seasoning, let the duck rest in the fridge for a few hours or overnight. This lets the flavors penetrate. Just before cooking, score the breast skin in a crosshatch pattern. This helps render fat and creates more crispy surface area.
Step 2: Trussing and Securing on the Spit
A balanced duck spins evenly and cooks perfectly. Trussing creates a compact shape.
Use kitchen twine. Tuck the wingtips behind the back. Tie the legs together snugly against the body. This prevents limbs from flopping during rotation.
Now, mount the duck on the spit rod. Slide the rod through the cavity, entering between the legs and exiting near the neck. The goal is perfect centering. The bird should look straight and balanced. Use the spit forks to secure it firmly at both ends. Give the rod a test spin with your hands. The duck should rotate smoothly without a heavy side dropping.
A well-trussed and centered duck is the secret to even cooking and a stunning presentation.
This careful setup is what makes a grilled duck on rotisserie so special. It ensures every part of the bird gets equal time in the heat.
Step 3: Preheating and Setting Up the Grill
Your grill needs to be a steady, indirect oven. Direct flames will burn the skin.
For charcoal grills, light a full chimney of coals. Once hot, pour them into two baskets or piles on opposite sides of the grill. Place a sturdy drip pan filled with a little water in the center, between the heat sources.
For gas grills, turn on only the outer burners to a medium-high setting. Leave the center burner(s) off. Place your drip pan directly on the heat deflectors or flavorizer bars in this cool zone.
Your target grill temperature is 375°F to 400°F (190°C to 205°C). Preheat with the lid closed for at least 15 minutes. Attach the spit motor, start the rotation, and close the lid. You are now officially executing a grilled duck recipe on a rotisserie!
This indirect heat setup, with the drip pan catching fats, creates a convection-like environment. The duck roasts gently in its own juices, while the rotating action bastes it continuously. You've laid the groundwork for a masterpiece.
Grill Mastery: Heat Management and Doneness Checks

Managing the fire and checking doneness are key to making a crispy rotisserie duck. Your hard work pays off here. Now, focus on the grill's heat and how the duck changes.
Think of yourself as a conductor, not just a cook. You need to balance heat, time, and patience for perfection. These best duck grilling tips will help you through the final steps.
Managing the Fire for Even Cooking
Even, moderate heat is key for juicy meat and crispy skin. For charcoal grills, adjust the vents to control temperature. Open vents increase heat, while closing them lowers it. On a gas grill, just turn the burners up or down.
A drip pan is crucial here. Place it under the duck to catch fat. This prevents flare-ups and makes a tasty sauce later. Keep the heat indirect, with coals or burners on the sides, not under the bird.
Dealing with Flare-Ups Safely
Duck's fat drips, causing flare-ups. Small ones are okay, but big ones can burn the skin. Safety first is the rule.
- Always use a drip pan filled with a little water.
- Maintain a true indirect heat setup.
- If a flare-up persists, temporarily use the grill lid as a shield.
- Keep a fire extinguisher or baking soda nearby for absolute emergencies.
| Aspect | Charcoal Grill | Gas Grill |
|---|---|---|
| Primary Control | Air Vents (Intake & Exhaust) | Burner Knobs |
| Target Temp Zone | 325°F - 375°F (Medium) | 325°F - 375°F (Medium) |
| Adding Fuel | Add pre-lit coals to sides | Simply adjust burner |
| Best for Flare-Up Prevention | Drip pan + banked coals | Drip pan + center burner off |
The Art of Knowing When It's Done
Time is a guide, but temperature is the real key. A whole duck takes 1.5 to 2 hours on the rotisserie. This is the general answer to how long to grill duck on rotisserie. Start checking the internal temperature with a good meat thermometer after the first hour.
Check multiple spots. The most important readings are in the thickest part of the thigh and the breast. The duck is safe to eat when it reaches 165°F (74°C). For extra tender meat, some chefs pull it at 160°F, as the temperature will rise a few degrees while resting.
Resting is non-negotiable. Let the duck sit for 15 to 30 minutes after taking it off the heat. This allows the juices to redistribute back into the meat, ensuring every slice is moist and flavorful.
The Final Crisp: Perfecting the Skin
The glorious, crackling skin is the prize. You laid the groundwork by drying the bird thoroughly before cooking. The rotisserie action naturally bastes the skin, but your heat management seals the deal.
Avoid high heat at the end, which can burn the skin before the meat is done. Consistent, medium heat renders the fat slowly and crisps the skin evenly over the entire cook. If the skin isn't as crisp as you'd like in one area, you can briefly sear that spot over direct heat after the duck is cooked and rested.
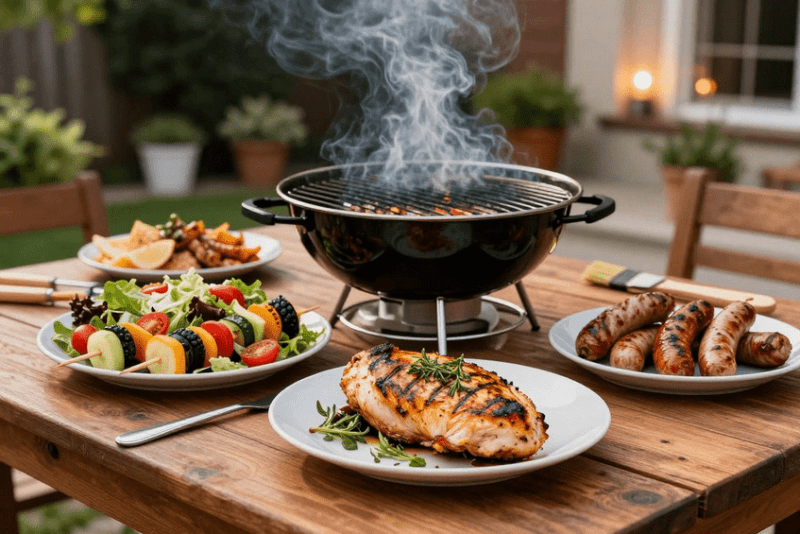
Don't waste the golden fat in your drip pan! Strain it and use it to roast potatoes or vegetables for an incredibly flavorful side dish. Mastering these final steps truly elevates your result from simply cooked to chef-level crispy rotisserie duck.
Conclusion
Learning to make a rotisserie duck is a great achievement. You've discovered how to trim and dry it right. You also know how to manage the fire for crispy skin.
Success comes from being patient during drying. Keeping an eye on the grill's temperature is key for juicy meat. The rotisserie makes the duck roast evenly golden.
Now, you can enjoy the fruits of your labor. Serve your rotisserie duck with classic sides. Try it with Asian-style scallion crepes and hoisin sauce. Use the fat for roasting potatoes.
Leftover rotisserie duck is a treasure. Store it in the fridge for up to three days. Or freeze it for a quick, tasty meal later.
This rotisserie duck recipe is perfect for any gathering. Share it with friends and family. Your new grilling skill will bring many memorable meals.
FAQ
Can I use any grill for rotisserie duck?
How do I prevent flare-ups from all the duck fat?
What's the secret to getting the skin really crispy on a rotisserie?
How long does it take to grill a duck on a rotisserie?
Do I need to truss the duck, and why?
Can I use a glaze or sauce while the duck is grilling?
What should I do with all the rendered duck fat?
Is a dry brine or a wet rub better for rotisserie duck?