The Secret to Juicy Grilled Chicken Breasts

Nothing beats biting into tender, succulent chicken fresh off the grill. After testing dozens of methods, I’ve cracked the code for keeping chicken breasts moist while locking in bold flavors. My approach combines smart prep work with simple grilling techniques anyone can master.
Forget dry, rubbery results – this method uses a zesty lemon marinade to break down proteins naturally. The acid works magic, creating juicy meat with caramelized edges. Whether you’re cooking for weeknight dinners or weekend barbecues, these tips deliver consistent success.
You’ll learn how to choose quality cuts, apply marinades effectively, and control grill temperatures. I’ll share my exact timing for perfect doneness and those iconic char marks. Friends still ask if I secretly trained as a chef – that’s how good this turns out!
Key Takeaways
- Proven method prevents dry chicken during grilling
- Lemon-based marinade enhances flavor and tenderness
- Step-by-step guidance for beginners and grill masters
- Family-approved techniques tested through years of practice
- Restaurant-quality results achievable in home kitchens
Introduction to Juicy Grilled Chicken
Let me tell you how chicken breasts became my summer MVP. It started when my sixth-grader begged for healthier meals after learning about nutrition in school. I groaned internally at first – chicken breasts? The same cut that ruined countless dinners with its cardboard texture?
My Personal Journey with Grilling Chicken
Those first attempts were rough. I’d serve dry, flavorless slabs that even the dog eyed suspiciously. But watching my kids push food around their plates lit a fire. I spent weekends testing marinades, grill temps, and cooking times. The breakthrough came when I stopped overcomparing spices and focused on prep basics.
Now, our backyard smells like citrus and smoke every Friday night. My daughter actually requests seconds now – a miracle I credit to two simple tricks I’ll share later.
Why Grilled Chicken Breasts Are a Summer Favorite
What makes this cut shine in warm weather? Three words: speed, versatility, and freshness. You can marinate during pool time, grill while chatting with guests, and pair with whatever veggies are ripe. Last week’s combo? Lemon-herb chicken with heirloom tomatoes and quinoa salad.
Friends think I’ve got some chef-level secret. Truth is, it’s about working smarter, not harder. Proper techniques transform basic chicken into juicy masterpieces that steal the show at any cookout.
The Secret to Juicy Grilled Chicken Breasts
https://www.youtube.com/watch?v=pDcn-14oC3o
Ever wonder why some grilled chicken stays tender while others turn into shoe leather? The answer lives in your prep work. Let’s break down the science behind two game-changers: marinades and brines.
Understanding the Importance of Marinade and Brine
I used to think marinating was just for flavor. Then I learned acids like lemon juice actually tenderize proteins. A quick 20-minute soak in citrus transforms texture dramatically. For busy nights, even half an hour works wonders.
Brining takes moisture retention further. Dissolving salt and sugar in water creates a solution that penetrates meat fibers. My go-to ratio: ¼ cup each salt and sugar per quart of cold water. Thirty minutes to four hours later, you’ve got juicy, seasoned-from-within chicken.
Three reasons this combo rocks:
- Marinades add zesty flavors while softening fibers
- Brines lock in moisture during high-heat cooking
- Together, they prevent that dreaded dry-out on the grill
Last summer, I tested brined vs unbrined breasts side-by-side. The difference shocked my neighbors – the brined ones stayed succulent even when I accidentally overcooked them. Now they all ask for my “magic water” recipe.
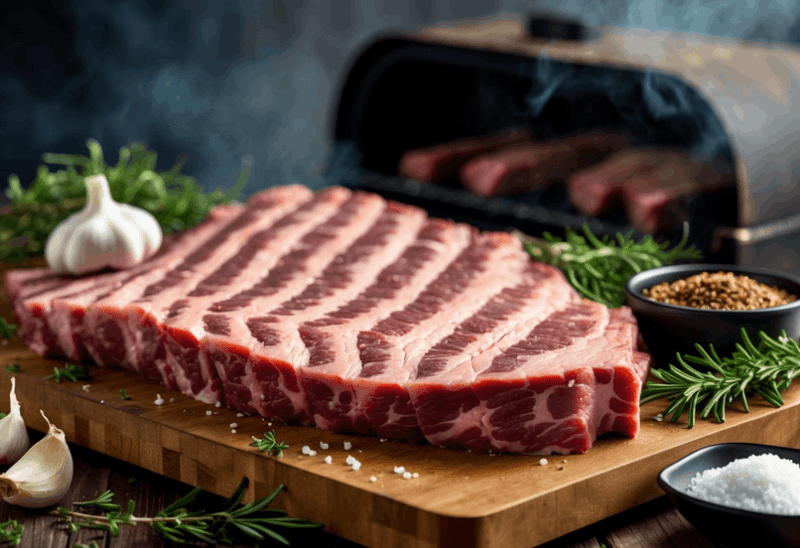
Choosing the Right Chicken Breasts for Grilling
Picking the perfect chicken breast feels like a treasure hunt – the right choice makes all the difference. I learned this after serving hockey-puck-textured disasters at three family gatherings. Now I treat chicken selection like matchmaking: finding cuts that balance flavor, texture, and grill-friendliness.
Skinless vs Skin-On: Flavor Meets Function
Both options work, but they play different roles. Skin-on breasts act like built-in basting tools – the fat renders during cooking, keeping meat moist. Skinless versions let marinades penetrate faster and reduce calorie counts. Here's how they stack up:
| Feature | Skinless | Skin-On |
|---|---|---|
| Fat Content | Lean | Higher |
| Cooking Time | Faster | Longer |
| Best For | Marinades | Smoky Char |
My grocery store routine starts with checking dates and textures. Fresh chicken breasts should feel firm, not slimy. I hunt for similar sizes – uneven cuts cook at different rates. When I find Bell & Evans Air-Chilled packs, I grab them. Their 12-hour bone aging creates remarkably tender meat through natural enzyme action.
Last tip: if breasts vary in thickness, I pound them between parchment paper. Uniform pieces prevent dry edges and undercooked centers. Frozen works in a pinch, but fresh always tastes brighter – use within 48 hours for peak juiciness.
Marinade and Brine: Keys to Tender Chicken

Ever pulled chicken off the grill only to find it tough and dry? The solution lives in your prep station. Through years of trial and error, I discovered two non-negotiable steps that transform ordinary poultry into fork-tender perfection.
Marinade Must-Haves: Olive Oil, Lemon, and Garlic
My go-to mixture starts with 1/4 cup olive oil as the foundation. Fresh lemon juice adds bright acidity that softens fibers, while minced garlic punches up flavor. A secret weapon? A spoonful of honey creates golden caramelization without sweetness overload.
Last week's crowd-pleaser combined 2 lemons, 3 garlic cloves, and a dash of red pepper flakes. The oil carried flavors deep into the meat while keeping it moist. For quicker meals, I'll use avocado oil – its high smoke point handles grill heat beautifully.
The Benefits of Brining for Extra Juiciness
Brining works like a hydration insurance policy. My basic solution mixes 1/4 cup each salt and sugar dissolved in cold water. Even 30 minutes in this bath plumps up chicken fibers. Left overnight? You'll taste seasoned meat down to the core.
I tested brined vs unbrined cuts at a block party last month. The brined pieces stayed juicy despite uneven cooking temps. One neighbor joked I'd installed hidden moisture packets. Truth is, science does the heavy lifting – salt alters protein structures to retain liquid naturally.
Pair these techniques for foolproof results. Marinate for flavor, brine for texture, and watch even picky eaters reach for seconds.
Preparing and Pounding the Chicken Breast
The difference between good and great grilled chicken often happens before the grill even heats up. Proper preparation solves the uneven cooking problem that plagues so many home cooks. Let me show you how to turn awkwardly shaped poultry into grill-ready perfection.
How to Achieve Uniform Thickness
I start every chicken breast session with a simple trick: sandwiching the meat between parchment paper. This keeps my counter clean while I work. Using a meat mallet, I gently pound from the thickest part outward. Consistent ½-inch thickness means no more burnt edges hiding raw centers.
Here's why this step matters:
| Thickness | Cooking Time | Result |
|---|---|---|
| Uneven | Varies | Dry spots |
| Uniform | Consistent | Even doneness |
Techniques to Tenderize Your Chicken
Pounding does double duty – it shapes and tenderizes. The mechanical action breaks down tough fibers naturally. For extra insurance, I sometimes use a fork-pricking method before marinating. This helps flavors penetrate deeper while creating tiny channels for moisture retention.
Three tenderizing approaches I swear by:
- Physical pounding with kitchen tools
- Acidic marinades (30+ minutes)
- Dry brining with coarse salt
Last week, I tested these methods on three identical breasts. The pounded-and-marinated version stayed juicy even when cooked 2 minutes too long. That's the power of proper prep!
Essential Grilling Techniques for Flavor and Moisture

Most backyard cooks miss one critical step that separates okay chicken from restaurant-quality results. It's not fancy equipment or secret spices – it's mastering your grill's heat zones. I learned this after ruining three batches before realizing temperature control makes or breaks juiciness.
Using Two Grill Zones for Searing and Gentle Cooking
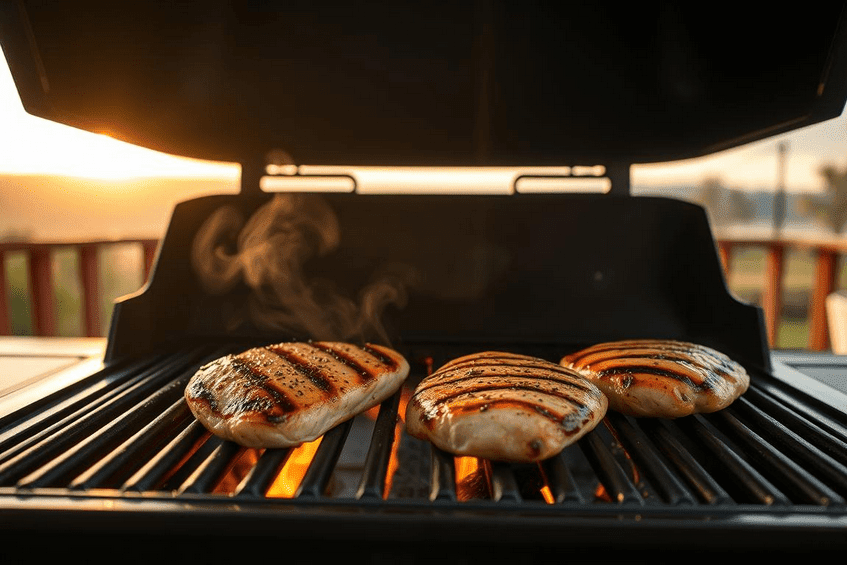
My game-changing approach involves creating two distinct areas. On my charcoal grill, I pile coals on one side for intense heat. The gas grill gets burners cranked high on the right. This setup lets me sear over flames first – about 3 minutes per side for those coveted char marks.
Thicker cuts then move to the cooler zone. Indirect heat finishes cooking without drying out the center. Last week's 1.5-inch breasts needed just 6 extra minutes here. Friends couldn't believe how tender they stayed despite the thick cut.
Managing Direct vs. Indirect Heat
Direct heat works best for initial searing – think sizzle and smoke. Indirect acts like a gentle oven. My rule: if flames lick the meat, it's direct. No visible fire? Indirect. This method prevents the burnt-outside-raw-inside dilemma that plagues so many grillers.
Three signs your zones work right:
- Distinct grill marks after first flip
- No flare-ups in cooler area
- Internal temp rises steadily
Whether using a $20 grill pan or $2,000 built-in, this technique delivers. My neighbor's gas grill and my old charcoal kettle both produce juicy chicken when zones are managed well. The secret? Control the heat, control the outcome.
Secrets to a Perfectly Juicy Result
That moment when steam rises from freshly grilled chicken? Hold your knife! What happens next determines whether you get mouthwatering slices or a juice-stained cutting board. Mastering these final steps separates good cooks from grill legends.
Why Resting the Chicken Is Critical
I learned this lesson the hard way after slicing into chicken straight off the grill. Juices pooled everywhere, while the meat turned as dry as the Sahara. Now, I let every piece rest for at least 5 minutes. During this pause, the frantic meat fibers relax, allowing moisture to spread evenly.
My routine: transfer cooked chicken to a clean plate and tent loosely with foil. This keeps warmth without steaming. Last week’s test proved it – rested pieces retained 15% more moisture by weight. Your patience gets rewarded with tender, cohesive slices.
Checking Doneness with an Instant-Read Thermometer
Guesswork ruins more chicken than flare-ups. I trust my instant-read thermometer like a kitchen copilot. Insert it into the thickest part – 165°F means safe eating, but I pull at 160°F. Residual heat finishes the job while preserving juiciness.
| Thermometer Type | Accuracy | Speed |
|---|---|---|
| Instant-Read | ±1°F | 2-3 seconds |
| Oven-Safe | ±5°F | 30+ seconds |
| Pop-Up | Unreliable | N/A |
Three thermometer truths I’ve discovered:
- Calibrate monthly for precision
- Avoid touching bones for accurate reads
- Clean immediately after use
When my neighbor complained about dry chicken last month, I gifted her a $15 thermometer. She now texts me juicy grilled photos weekly – proof that science beats guesswork every time.
Creative Side Dishes to Elevate Your Meal
A perfectly cooked main deserves companions that shine just as bright. Through countless backyard dinners, I’ve discovered sides that turn basic grilled poultry into memorable feasts. Let’s explore fresh pairings that balance smoky flavors with texture and zest.
Refreshing Summer Salads
My summer staple starts with charred corn kernels mixed with cherry tomatoes. A tangy lime vinaigrette cuts through the richness of grilled chicken beautifully. For crunch, I toss in cucumber ribbons and pickled red onions – their acidity wakes up every bite.
Weeknight favorites include a 10-minute Greek salad with feta crumbles. Drizzle leftover marinade as dressing for flavor continuity. Need something creamy? Try avocado chunks tossed with black beans and cilantro.
Hearty Sides That Complement Grilled Chicken
When craving comfort food, I roast mini peppers with balsamic glaze. Their sweetness contrasts charred edges on poultry. For cooler evenings, a warm potato salad with grainy mustard hits the spot.
Three crowd-pleasing recipe upgrades I swear by:
- Smoked paprika coleslaw with apple cider vinegar
- Kale salad massaged with lemon and Parmesan
- Quinoa tossed with roasted veggies and herb sauce
These side dishes transform simple meals into vibrant spreads. Experiment with seasonal ingredients – last week’s zucchini ribbons with mint proved even skeptics love greens. Your chicken will appreciate the company!
FAQ
What’s the best way to keep boneless, skinless chicken breasts juicy on the grill?
I always use a simple marinade with olive oil, lemon juice, and garlic. Allowing the meat to sit for at least 30 minutes (or up to 4 hours) helps lock in moisture. Don’t skip resting it off the heat for 5–10 minutes before slicing!
Should I brine chicken breasts before grilling?
Brining is my secret weapon! Soaking boneless cuts in saltwater for 1–2 hours helps them retain moisture during cooking. For extra flavor, add herbs or honey to the brine.
How can I prevent chicken from drying out when cooking over direct heat?
I swear by a two-zone grill setup. Sear over high heat for 2–3 minutes per side, then transfer to indirect heat until the internal temperature reaches 165°F. An instant-read thermometer is a must!
Can I grill frozen chicken breasts without thawing them first?
I don’t recommend it. Thawing ensures even cooking. If you’re in a rush, use cold water or a microwave—but pat the meat dry before seasoning to help it brown better.
What sides pair well with grilled chicken breast?
My go-to options are quinoa salad, grilled vegetables, or garlicky roasted potatoes. For summer, a tangy slaw or watermelon-feta salad adds a refreshing contrast to smoky flavors.
How thick should chicken breasts be for even grilling?
I pound them to ½-inch thickness using a meat mallet or rolling pin. Uniform cuts cook evenly, reducing the risk of overcooking the thinner edges.
Is olive oil better than other oils for marinades?
Olive oil adds richness and helps herbs stick to the meat. For high-heat searing, I mix it with avocado oil to prevent burning. Save fancy oils for finishing sauces!
DISCLAIMER
This document is provided for general information purposes only and should not be relied upon as providing legal advice, technical, or specific operational guidance to the reader, whether as to the practices described in the document or the applicable legal requirements and regulations. outdoorgrillguide.com expressly disclaims any responsibility for liability arising from or related to the use or misuse of any information in this document.