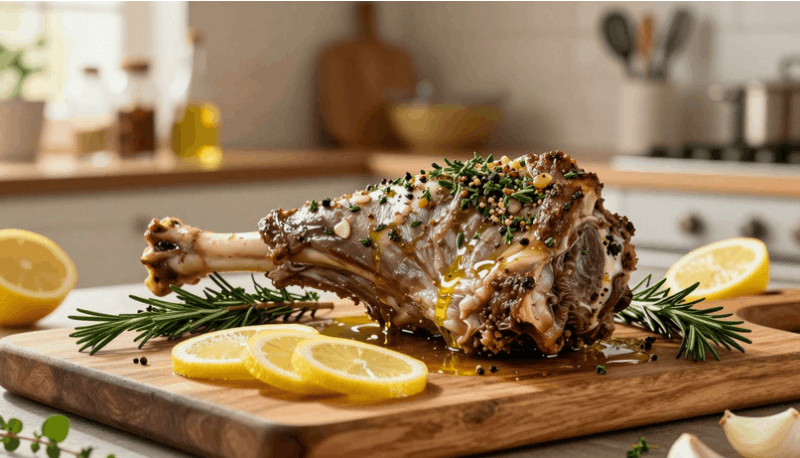

Nothing says holiday feast like a juicy, flavor-packed stuffed prime rib. This dish combines smoky char from the grill with rich, herby stuffing for a showstopping centerpiece. Whether you’re using a smoker, oven, or kamado-style grill, the result is tender beef with a crispy bark.
The secret lies in quality ingredients—think prime-grade beef and fresh herbs. A garlic-herb butter stuffing infuses every bite, while precise temperature control ensures perfect doneness. From rare to medium, hitting the right internal temp keeps the meat juicy.
I’ll walk you through selecting the best cut, prepping the stuffing, and nailing the cook. Resting the roast locks in those savory drippings, making every slice unforgettable. Let’s dive in!
Choosing the Perfect Rib Roast for Stuffing
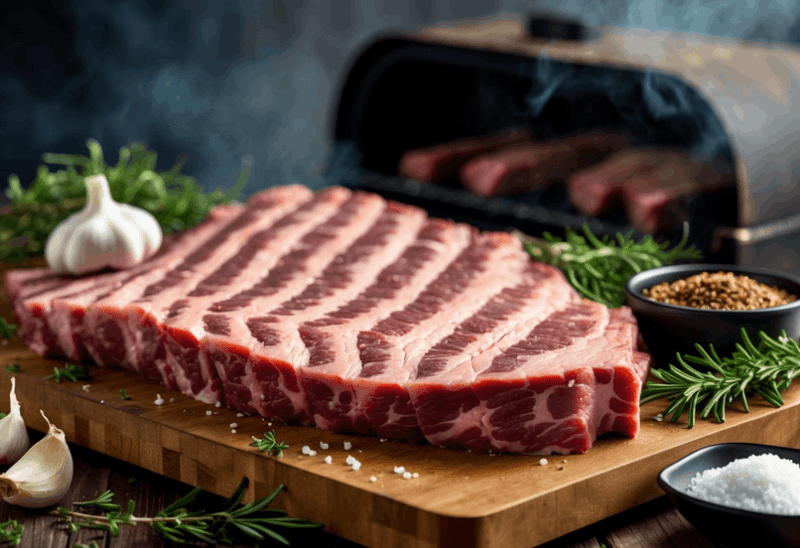
Selecting the right cut makes all the difference for a succulent, showstopping meal. Whether you prefer bone-in or boneless, focus on *quality* and *marbling* to guarantee juicy results. Here’s how to pick a winner every time.
Bone-In vs. Boneless: Which Is Best?
Bone-in roasts deliver richer flavor and natural insulation, keeping the meat moist. The bones add dramatic presentation value and enhance taste near the edges. However, boneless cuts simplify stuffing and carving, with even seasoning throughout.
"Bone-in roasts offer built-in flavor boosters, while boneless versions give you control over every slice."
What to Look for in Marbling and Color
Opt for USDA Prime or Choice grades—their fat streaks (*marbling*) melt during cooking, basting the meat from within. Avoid grayish hues; bright red color indicates freshness. For portions:
- Bone-in: 1 pound per person
- Boneless: ¾ pound per person
Remember, a well-marbled rib roast ensures every bite is tender and flavorful. Pair that with vibrant color, and you’ve got a foolproof foundation.
Preparing Your Flavorful Stuffing
Flavor-packed fillings elevate every bite of your masterpiece. Whether you prefer classic herby richness or bold veggie twists, the right stuffing ties everything together. Below, I’ll share my go-to recipes and pro tips for perfect consistency.
Garlic Herb Butter: A Classic Choice
This timeless blend melts into the meat, infusing it with rich, savory notes. Combine softened butter, minced garlic (4-5 cloves), rosemary, thyme, and a handful of breadcrumbs. For depth, add a dash of Spanish paprika. Refrigerate the mix for 30 minutes to firm it up before stuffing.
Creative Alternatives Like Spinach and Mushrooms
For a veggie-forward twist, sauté baby spinach, cremini mushrooms, and shallots with red pepper flakes. Cool completely before folding into butter—this prevents a soggy texture. Craving boldness? Layer roasted red peppers and picante provolone for a gourmet punch.
| Stuffing Type | Key Ingredients | Best For |
|---|---|---|
| Garlic Herb Butter | Butter, garlic, rosemary, breadcrumbs | Traditionalists |
| Spinach-Mushroom | Baby spinach, mushrooms, shallots | Vegetable lovers |
| Roasted Pepper Provolone | Red peppers, provolone, fresh basil | Bold flavor seekers |
Pro Tip: Always chill stuffed roasts for 1-2 hours before grilling. This helps the filling set and boosts flavor absorption.
How to Grill a Stuffed Rib Roast Step by Step
Transform your holiday meal with a perfectly grilled stuffed rib roast. I'll walk you through each critical step—from prepping the meat to creating that crave-worthy crust. Let's turn that premium cut into a smoky, juicy masterpiece.

Trimming and Butterflying the Roast
Start by removing excess fat, leaving just a ¼-inch cap. This ensures better stuffing adhesion and even cooking. Use a sharp boning knife for precision—it makes all the difference.
For butterflying, slice horizontally through the center without cutting all the way through. Imagine opening a book—this creates a flat surface for your filling. Keep your cuts even for consistent thickness.
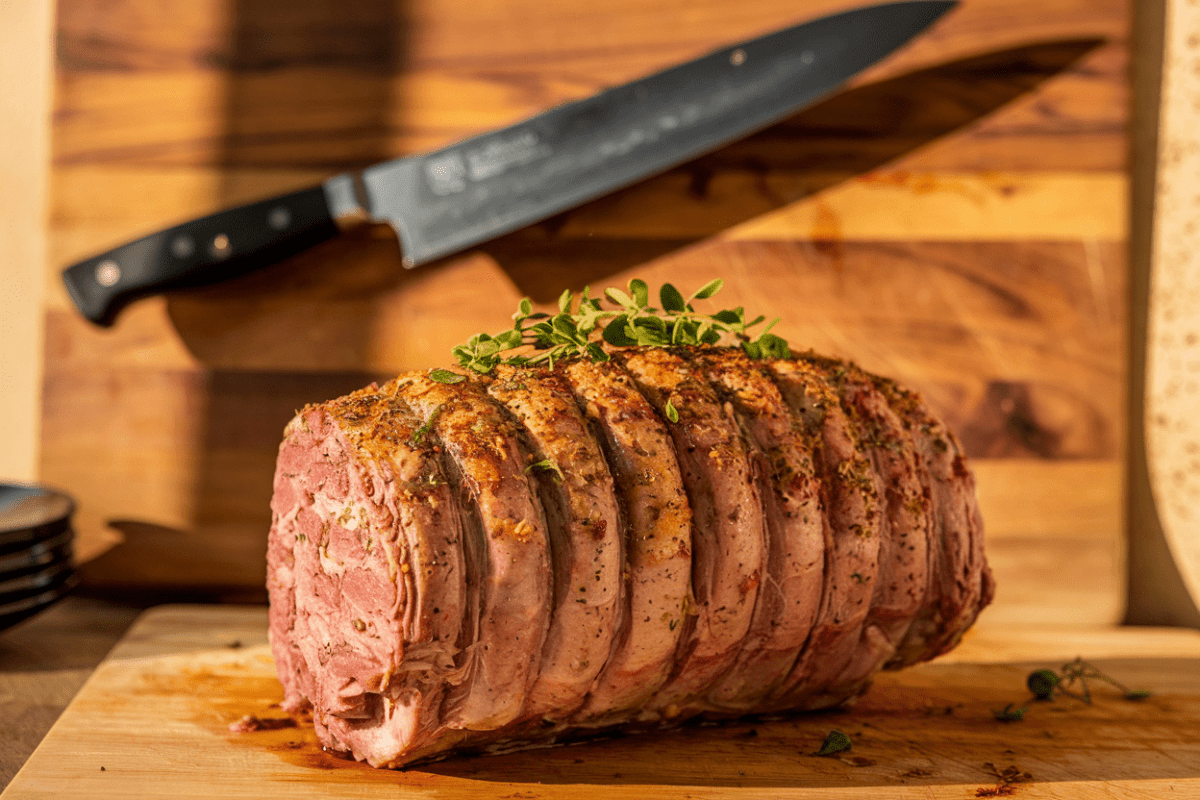
Stuffing and Tying for Even Cooking
Spread your chosen mixture evenly across the meat, leaving 1-inch borders. This prevents spillage during cooking. For garlic herb butter, chill it slightly first—it’s easier to handle.
- Fold the meat back over the filling
- Secure with butcher’s twine every inch
- Trim excess string for clean presentation
Tight tying maintains the shape and ensures uniform heat distribution. Your slices will hold together beautifully when served.
Seasoning for a Perfect Crust
The exterior deserves just as much attention as the stuffing. I recommend two options:
- Classic beef rub: Salt, pepper, garlic powder, and smoked paprika
- Dijon-horseradish mix: Adds tangy heat that complements the rich meat
Press the seasoning firmly onto the surface. This creates that irresistible bark when it hits the grill. For best results, let it sit at room temperature for 30 minutes before cooking.
With these steps complete, you're ready for the grill. The prep work pays off when you carve into tender, flavorful slices that wow every guest.
Mastering Grill Temperature and Timing
Controlling heat is the secret to unlocking a tender, smoky masterpiece. Whether using charcoal, gas, or a smoker, precision ensures juicy results. Let’s break down the ideal setup and timing for flawless doneness.

Low and Slow: The Key to Juicy Results
Indirect heat at 225°F lets the meat cook evenly without drying out. Aim for 35–40 minutes per pound for a 3–6 lb roast. This gentle approach melts fat into marbling, basting the beef from within.
Use a two-zone grill setup:
- Place the roast away from direct flames.
- Insert a thermometer into the thickest part (avoid bones).
- Target 115°F internally before searing—it’ll rise 10–15°F while resting.
When to Sear for a Crispy Exterior
Finish with a 5–10 minute blast at 700°F. This caramelizes the crust without overcooking the center. For kamado-style grills, open vents to max heat just before serving.
"Searing locks in juices and adds texture contrast to each slice."
Rest the meat for 20 minutes tented in foil. This redistributes juices, ensuring every bite is succulent. Now, you’re ready to carve and impress.
Checking Doneness and Resting Your Roast
A rested roast delivers flavor-packed *slices* worth the wait. Nailing the *internal temperature* and patience during resting ensures juicy, tender results. Here’s how to perfect both.
Hit the Right Temperature Every Time
Use a digital *thermometer* to check the thickest part of the meat, avoiding bones. Target these temps for ideal doneness:
- Rare: 125°F (bright red center)
- Medium-rare: 130°F (warm pink core)
- Medium: 135°F (slightly pink hue)
Remember, the *temperature* rises 5–10°F while resting. Pull the roast early to avoid overcooking.
The Science Behind Resting Meat
Waiting 25–30 minutes lets juices redistribute. Cutting too soon spills flavorful drippings, leaving dry *slices*. Tent loosely with foil to retain warmth without steaming.
"Resting is non-negotiable—it turns good meat into greatness."
For a pro touch, strain reserved drippings into a sauce. Carve against the grain with a sharp knife for tender, even portions.
Serving and Storing Leftovers Like a Pro
Presentation matters just as much as flavor when serving a showstopping meal. From elegant slices to clever leftovers repurposing, these techniques ensure your prime rib shines at every stage. I’ll share my steakhouse secrets for carving, pairing, and preserving.
Carving for Picture-Perfect Slices
Always cut against the grain with a sharp knife—this shortens muscle fibers for tender bites. Angle your blade at 45° for elegant, restaurant-worthy portions. Wipe the knife between cuts for clean edges.
Pro Tip: Save the au jus from resting to drizzle over plated slices. It adds moisture and enhances visual appeal.
Winning Side Dish Pairings
Complement your prime rib with these crowd-pleasers:
- Creamy horseradish sauce (balances richness)
- Garlic-roasted Brussels sprouts (adds crunch)
- Twice-baked potatoes (comfort food pairing)
Reheating Without Drying Out the Meat
Revive leftovers by adding moisture. Place meat in a baking dish with ¼ cup beef broth, cover with foil, and warm at 250°F for 10 minutes. This gentle method preserves texture.
Smart Storage Solutions
Keep unused portions fresh with these steps:
- Cool completely within two hours
- Wrap tightly in butcher paper or vacuum seal
- Label with date (fridge: 3 days; freezer: 3 months)
| Storage Method | Duration | Best For |
|---|---|---|
| Refrigerator | 3-5 days | Quick reuse in sandwiches |
| Freezer | 3 months | Future stews or pot pies |
| Vacuum Sealed | 6 months | Long-term preservation |
Final Touch: Arrange slices on a warm platter with fresh herbs for top-tier presentation. Leftovers become tomorrow’s gourmet steak salad or hearty breakfast hash.
Conclusion
Mastering this dish turns every meal into a celebration. A prime rib stuffed with garlic herb butter or spinach-mushroom filling delivers unmatched richness and wow-worthy presentation. Experiment with different stuffings—each adds its own twist to the classic recipe.
Essential tools like a meat thermometer and butcher’s twine ensure precision. For beginners, try smaller cuts first to perfect your technique. Resting the meat locks in juices for tender, flavor-packed slices.
Ready to shine? Fire up the grill, snap a photo, and tag #GrillMaster. Your next prime rib masterpiece awaits!
FAQ
Q: Should I choose bone-in or boneless for a stuffed rib roast?
A: Bone-in adds more flavor and helps retain moisture, but boneless is easier to stuff and carve. It depends on your preference!
Q: What’s the best stuffing for a prime rib roast?
A: Garlic herb butter is a classic, but spinach, mushrooms, or blue cheese also work well. Get creative with bold flavors!
Q: How do I butterfly a rib roast for stuffing?
A: Use a sharp knife to make a horizontal cut, leaving about an inch uncut. Open it like a book for even stuffing distribution.
Q: What’s the ideal grill temperature for cooking?
A: Start high (450°F) for a sear, then lower to 325°F for slow cooking. This ensures a crispy crust and juicy interior.
Q: How long should I rest the meat before slicing?
A: At least 15–20 minutes. Resting lets juices redistribute, keeping every bite tender and flavorful.
Q: What internal temperature should I aim for?
A: 120°F for rare, 130°F for medium-rare, and 140°F for medium. Use a meat thermometer for accuracy.
Q: Can I reheat leftovers without drying them out?
A: Yes! To lock in moisture, warm slices in a 250°F oven with a bit of beef broth or butter.
DISCLAIMER
This document is provided for general information purposes only and should not be relied upon as providing legal advice, technical, or specific operational guidance to the reader, whether as to the practices described in the document or the applicable legal requirements and regulations. Backyard Grilling Pros.com expressly disclaims any responsibility for liability arising from or related to the use or misuse of any information in this document.