How to Grill on a Charcoal Grill: Tips for Better Flavor and Heat Control

The art of charcoal grilling transforms ordinary meals into extraordinary culinary experiences. Unlike gas grills that offer convenience, charcoal grills deliver unmatched smoky flavor and cooking versatility that backyard chefs crave.
Mastering charcoal grilling requires understanding fire management and temperature control. These fundamental skills separate mediocre results from restaurant-quality dishes cooked in your own backyard.
This comprehensive guide reveals proven techniques for controlling heat, building perfect fire zones, and infusing maximum flavor into everything you cook. Whether you're grilling steaks, smoking ribs, or roasting vegetables, these methods will elevate your outdoor cooking game.
Understanding Charcoal Grilling Basics

Charcoal grilling offers a traditional cooking experience that gas methods cannot replicate. The combustion process creates complex flavor compounds that penetrate food surfaces during the cooking process.
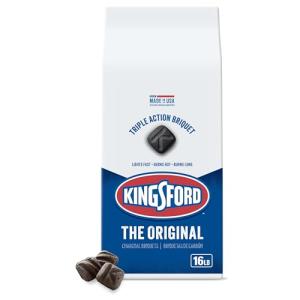
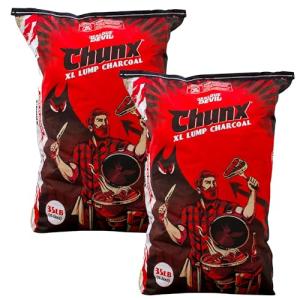
Two main charcoal types dominate the market. Briquettes provide consistent burn time and steady temperature control, while lump charcoal delivers higher heat and authentic wood smoke flavor.
The charcoal grill smoker combination allows versatility in cooking methods. A single unit handles direct grilling, indirect roasting, and low-and-slow smoking techniques.
Charcoal Types and Their Impact on Cooking
Briquettes contain compressed sawdust and coal dust with binding agents. They ignite consistently and maintain steady cooking temperature for extended periods.
Lump charcoal consists of pure carbonized wood without additives. This type burns hotter and cleaner but requires more frequent attention during long cooking sessions.
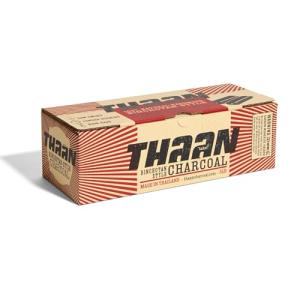
Hardwood charcoal adds distinct flavor profiles based on wood type. Hickory delivers strong smoke taste, while fruitwoods like apple and cherry provide subtle, sweet notes.
Essential Equipment and Tools

A chimney starter revolutionizes the charcoal lighting process. This simple tool eliminates lighter fluid need while ensuring even ignition across all coals.
Heat-resistant gloves protect hands when adjusting vents or moving hot grill components. Long-handled tongs and spatulas keep you safe from intense heat during cooking.
An instant-read thermometer removes guesswork from cooking. Accurate temperature readings ensure food safety and perfect doneness every time.
Temperature Control Tools
Proper airflow management determines cooking success on charcoal grills.
- Bottom vents regulate oxygen intake for fire intensity
- Top vents control smoke circulation and heat release
- Adjustable dampers fine-tune temperature zones
- Built-in thermometers monitor cooking environment
Charcoal Management Accessories
Specialized tools make charcoal handling safer and more efficient.
- Charcoal baskets contain fuel for indirect cooking
- Ash tools simplify cleanup after grilling sessions
- Heat deflectors create roasting zones
- Grill grates with different configurations optimize heat distribution
Safety Equipment
Protection gear prevents injuries during high-heat cooking.
- Fire extinguisher nearby for emergency situations
- Heat-resistant apron shields from sparks
- Eye protection when adding charcoal
- First aid supplies for minor burns
Cleaning and Maintenance Tools
Regular maintenance extends grill life and improves performance.
- Wire brushes remove food residue from grates
- Scrapers clean stuck-on debris
- Ash vacuums extract fine particles
- Protective covers shield from weather elements
Lighting Your Charcoal Grill the Right Way

The lighting method dramatically affects cooking temperature and flavor quality. Proper ignition techniques create consistent heat while avoiding chemical tastes in food.
Chimney starters provide the most reliable lighting method. Fill the chamber with charcoal, place crumpled newspaper underneath, and light the paper to begin the process.
Wait fifteen to twenty minutes until coals develop white ash coating. This indicates optimal burning temperature for transferring to the grill body.
Step-by-Step Lighting Process
- Fill chimney starter three-quarters full with chosen charcoal type
- Place two sheets of crumpled newspaper in bottom chamber
- Set chimney on fireproof surface away from flammable materials
- Light newspaper through bottom vents using long matches
- Allow flames to spread upward through charcoal pile
- Wait for top coals to ash over with gray-white coating
- Carefully pour hot coals into grill bottom using heat-resistant gloves
- Arrange coals according to desired heat zone configuration
Alternative Lighting Methods
Electric charcoal starters offer flameless ignition for safety-conscious grillers. Place the heating element among coals and plug in for eight to ten minutes.
Lighter fluid works when used sparingly and properly. Apply to charcoal pyramid, wait one minute for absorption, then ignite from multiple points.
Never add lighter fluid to burning coals. This dangerous practice causes dangerous flare-ups and imparts unpleasant chemical flavor to food.
Ready to Upgrade Your Grilling Experience?
Explore top-rated charcoal grills designed for superior heat control and consistent performance. Find the perfect smoker grill combination for your backyard cooking needs.
Creating and Managing Heat Zones

Heat zone configuration determines cooking versatility and success. Strategic charcoal placement creates multiple temperature areas within a single grill body.
The two-zone setup divides the grill into direct and indirect cooking areas. This arrangement handles everything from searing steaks to slow-roasting whole chickens.
Three-zone configurations add medium-heat capability between hot and cool sections. This setup provides maximum control for cooking multiple food types simultaneously.
Two-Zone Fire Configuration
Arrange all hot coals on one side of the charcoal grill for direct high-heat cooking. Leave the opposite side completely empty for indirect heat zone.
Direct heat zone reaches temperatures between four hundred and six hundred degrees. This area handles quick-cooking items requiring char and caramelization.
Indirect zone maintains temperatures between two hundred fifty and three hundred fifty degrees. Move food here after searing or for gentle cooking methods.
Three-Zone Setup for Maximum Versatility

Distribute coals in graduated density across the grill bottom. Place maximum charcoal on one side, moderate amount in center, and minimal coals on far side.
High-heat zone handles initial searing and quick-cooking vegetables. Medium zone finishes thicker cuts without burning exteriors.
Low-heat zone keeps food warm or provides gentle finish cooking. This area prevents overcooking while other items complete.
Temperature Control Through Airflow Management
Bottom vents supply oxygen that intensifies fire and raises cooking temperature. Open them fully for maximum heat, close partially for moderate temperatures.
Top vents release heat and smoke while drawing fresh air through bottom openings. Adjust both vent systems together for precise temperature control.
The ability to regulate airflow separates successful charcoal grilling from frustrating experiences. Small vent adjustments create significant temperature changes.
| Heat Zone | Temperature Range | Charcoal Arrangement | Best Uses | Vent Settings |
| High Direct | 450-600°F | Dense double layer | Searing steaks, burgers, vegetables | Both vents fully open |
| Medium Direct | 350-450°F | Single even layer | Chicken pieces, pork chops, fish | Bottom open, top half-closed |
| Low Indirect | 225-300°F | Sparse or side-banked | Smoking ribs, roasting, slow cooking | Both vents quarter-open |
| Warming Zone | 150-200°F | No direct coals beneath | Holding finished food, gentle warming | Top mostly closed, bottom cracked |
Maintaining Consistent Temperature
Add fresh charcoal every thirty to forty minutes during extended cooking sessions. Place new coals beside burning ones to ignite gradually.
Avoid removing the lid unnecessarily during cooking. Each opening releases accumulated heat and extends total cooking time significantly.
Monitor temperature through built-in thermometer or vent-mounted gauge. Make small airflow adjustments and wait five minutes before rechecking.
Smoking Techniques for Enhanced Flavor

Smoking transforms simple grilled food into complex flavor experiences. Wood smoke compounds penetrate meat surfaces and create distinctive taste profiles.
The charcoal grill smoker setup combines direct heat with smoke generation. This dual-purpose approach delivers both charcoal and wood smoke flavor in every bite.
Different wood types produce varying smoke characteristics. Matching wood selection to protein type optimizes flavor without overwhelming natural meat taste.
Choosing the Right Wood for Smoking
Hardwoods provide clean-burning smoke without resin or chemical flavors. Softwoods like pine create acrid, unpleasant taste and should never contact food.
Hickory delivers strong, bacon-like smoke ideal for pork and beef. This popular choice creates traditional BBQ flavor recognized across American grilling culture.
Fruitwoods including apple, cherry, and peach offer milder, sweet smoke. These selections complement poultry, pork, and fish without overpowering delicate flavors.
Strong Smoke Woods
- Hickory - bold bacon-like flavor for red meat
- Mesquite - intense earthy taste for beef
- Oak - medium-strong traditional BBQ smoke
- Walnut - robust flavor for game meats
Mild Smoke Woods
- Apple - sweet subtle smoke for pork and chicken
- Cherry - fruity mild flavor for poultry
- Maple - delicate sweet smoke for vegetables
- Pecan - gentle nutty undertones for fish
Wood Preparation and Application Methods

Soak wood chips in water for thirty minutes before use. This prevents immediate combustion and creates longer-lasting smoke production.
Wood chunks work better than chips for extended smoking sessions. Larger pieces smolder gradually without requiring frequent replacement during cooking.
Place wood directly on hot coals or in smoker boxes for gas-charcoal hybrid setups. Position near heat source but not in direct flames.
Controlling Smoke Intensity
Thin blue smoke indicates ideal smoking conditions and clean combustion. This barely visible smoke creates excellent flavor without bitter overtones.
Thick white smoke signals incomplete combustion and produces acrid taste. Increase airflow or reduce wood quantity when heavy smoke appears.
Add wood pieces gradually throughout cooking rather than loading all at once. This maintains consistent smoke levels and prevents overwhelming food with excessive flavor.
Master Grilling with Expert Resources
Download our free temperature and timing guide for perfect results every time. Get instant access to wood pairing charts and smoking techniques used by BBQ professionals.
Direct Grilling Methods for Perfect Results

Direct grilling places food immediately above hot coals for maximum heat transfer. This method creates caramelized crusts and distinctive char marks that define outdoor cooking.
High heat searing locks in moisture while developing complex Maillard reaction flavors. The cooking process requires attention and quick reflexes to prevent burning.
Proper technique balances exterior char development with interior doneness. Understanding heat intensity and timing produces consistently excellent results.
Searing Steaks and Burgers
Preheat grill grates for five minutes before adding meat. Hot metal creates immediate sear and prevents sticking during the cooking process.
Place steaks directly over hottest coals and resist the urge to move them. Allow three to four minutes per side for medium-rare doneness on one-inch cuts.
Burgers require gentler treatment than steaks despite similar cooking method. Form patties loosely and create slight center indentation to prevent puffing during cooking.
Grilling Vegetables and Seafood

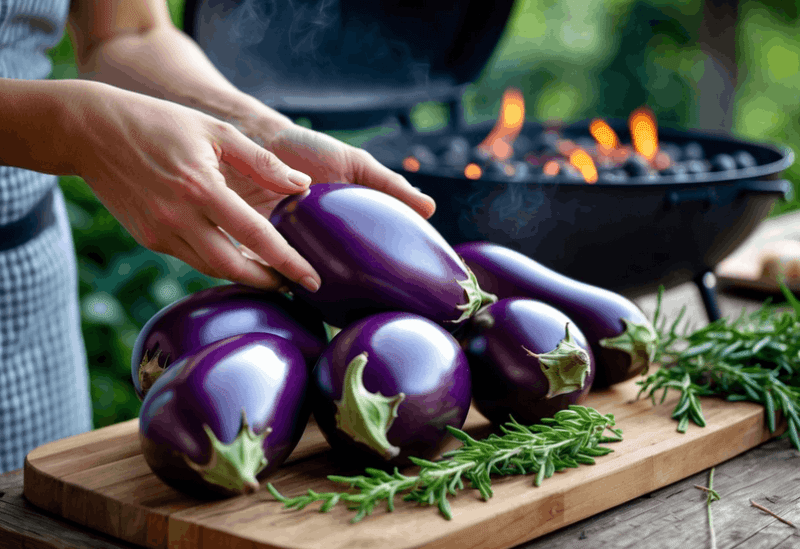
Vegetables benefit from medium-high direct heat that caramelizes natural sugars. Cut pieces uniformly for even cooking across different vegetable types.
Oil vegetables lightly before grilling to prevent sticking and enhance browning. Season with salt after cooking to avoid drawing out moisture prematurely.
Seafood cooks quickly over direct heat and requires careful monitoring. Fish fillets need four to five minutes total cooking time per inch of thickness.
Managing Flare-Ups
Fat dripping onto hot coals causes flame flare-ups that char food exteriors. Move food to cooler zone temporarily when flames appear.
Keep spray bottle filled with water nearby for controlling minor flare-ups. Light misting suppresses flames without extinguishing coals completely.
Trim excess fat from meat before grilling to minimize dripping. This preventive approach reduces flare-up frequency during cooking sessions.
Direct Grilling Best Practices
- Preheat grates thoroughly before adding food
- Oil food surfaces rather than grill grates
- Use tongs instead of forks to avoid puncturing
- Let meat rest five minutes after grilling
- Clean grates while still warm after cooking
Common Direct Grilling Mistakes
- Constantly flipping food interrupts searing process
- Pressing down on burgers releases flavorful juices
- Adding sauce too early causes burning
- Overcrowding grill reduces heat and prevents browning
- Using lighter fluid on hot coals creates dangerous flares
Indirect Cooking and Roasting Techniques

Indirect cooking transforms the charcoal grill into an outdoor oven. This method surrounds food with circulating hot air rather than exposing it to direct flame contact.
Large cuts requiring extended cooking time benefit from indirect heat approach. Roasts, whole poultry, and thick pork shoulders cook evenly without burning exteriors.
The technique requires patience and proper setup but delivers restaurant-quality results. Mastering indirect cooking expands backyard grilling capabilities dramatically.
Setting Up for Indirect Cooking
Bank hot coals on opposite sides of the grill with empty space in center. Place aluminum drip pan in the middle area beneath where food will sit.
Position food on grate above the empty center zone. Close lid and adjust vents to maintain target cooking temperature between two hundred fifty and three hundred fifty degrees.
Add water to drip pan to create humid cooking environment. Moisture prevents food from drying during long cooking sessions.
Roasting Whole Birds and Large Cuts

Whole chickens cook perfectly using indirect heat at three hundred twenty-five degrees. Calculate fifteen minutes per pound plus additional fifteen minutes for total cooking time.
Turkey requires lower temperature and longer time than chicken. Maintain grill temperature around three hundred degrees and plan thirteen minutes per pound.
Pork shoulder and beef brisket need low-and-slow approach for tenderness. Cook at two hundred twenty-five to two hundred fifty degrees for eight to twelve hours depending on size.
Temperature Monitoring and Adjustment
Insert probe thermometer into thickest part of meat without touching bone. Monitor internal temperature rather than relying solely on cooking time.
Replenish charcoal every hour during extended indirect cooking sessions. Add eight to ten fresh briquettes to maintain consistent heat levels.
Avoid opening lid unnecessarily during cooking process. Each peek releases accumulated heat and extends total cooking time by several minutes.
Advanced Temperature Control Strategies

Precise temperature control separates amateur grilling from professional-level results. Advanced techniques allow maintaining exact temperatures for hours during complex cooking projects.
Understanding the relationship between airflow, fuel amount, and heat output enables predictable temperature management. Small adjustments create significant differences in cooking environment.
These skills develop through practice and careful observation. Each grill has unique characteristics that experienced operators learn over time.
The Snake Method for Extended Burning
Arrange unlit charcoal in C-shaped pattern around grill perimeter. Light only one end to create slow-burning fuse effect.
This configuration burns progressively for six to eight hours without adding fuel. The method provides stable low temperatures perfect for smoking and slow roasting.
Place wood chunks at intervals along the charcoal snake. Smoke releases gradually as fire progresses along the fuel line.
The Minion Method for Long Cooks

Fill charcoal grill bottom with unlit briquettes. Pour small amount of hot coals on top to ignite from above downward.
Unlit charcoal catches fire gradually from the top layer. This creates twelve to sixteen hour burn time ideal for overnight brisket smoking.
Adjust bottom vents to control oxygen supply and burning rate. Smaller vent openings extend burn time while larger openings increase temperature.
Managing Heat for Different Cooking Stages
Start with high heat for initial searing phase. After developing crust, move food to moderate zone for interior cooking.
Finish thick cuts in low-heat zone to reach target internal temperature. This reverse-sear approach prevents overcooked exteriors with raw centers.
Rest meat in warming zone after cooking completes. This allows juice redistribution while maintaining serving temperature.
High Heat Strategy
Maximum temperature for quick searing and char development.
- Both vents fully open
- Fresh charcoal densely packed
- Lid open for maximum airflow
- Five to ten minute cooking duration
Medium Heat Strategy
Balanced temperature for thorough cooking without burning.
- Bottom vent open, top half-closed
- Single layer charcoal arrangement
- Lid closed for heat retention
- Fifteen to thirty minute duration
Low Heat Strategy
Gentle sustained heat for smoking and slow roasting.
- Both vents quarter-open
- Sparse charcoal with wood chunks
- Lid sealed except for checks
- Four to twelve hour duration
Maximizing Flavor Through Grilling Techniques

Flavor development extends beyond basic grilling mechanics. Strategic techniques amplify taste through smoke infusion, seasoning application, and cooking method selection.
Charcoal grilling smoking delivers complex flavor layers impossible with other cooking methods. The combination of wood smoke, charcoal combustion, and high-heat caramelization creates distinctive taste profiles.
Mastering these flavor-building approaches transforms simple ingredients into memorable dishes. Each technique contributes unique elements to the final eating experience.
Dry Rub Application and Timing
Apply dry rubs thirty minutes to two hours before cooking. Salt in the mixture draws surface moisture that later reabsorbs carrying spice flavors deep into meat.
Create bark formation through sugar caramelization in rub ingredients. Brown sugar, paprika, and other carbohydrates develop crusty exterior during low-and-slow cooking.
Balance salt, sweet, spicy, and savory elements in rub formulations. Proper seasoning enhances rather than masks natural meat flavor.
Basting and Mopping Techniques

Apply thin sauces and mops during final cooking stages to prevent burning. Sugar-based sauces caramelize quickly and require careful timing.
Vinegar-based mops add moisture and tang without heavy sweetness. These thinner applications work well throughout entire cooking process.
Layer flavors through multiple basting applications. Each coat adds complexity while building glossy, flavorful exterior.
Using Marinades Effectively
Acid-based marinades tenderize meat surfaces through protein breakdown. Limit marinating time to prevent mushy texture from over-tenderization.
Oil in marinades carries fat-soluble flavors and prevents sticking during grilling. Include aromatic ingredients like garlic, herbs, and spices for maximum impact.
Pat meat dry after marinating and before grilling. Excess surface moisture prevents proper searing and browning.
Reverse Searing for Perfect Doneness
Start thick cuts in low indirect heat zone until nearly reaching target temperature. Move to high direct heat for final crust development.
This method provides more control over internal doneness while achieving excellent exterior char. The technique works exceptionally well for premium steaks.
Monitor internal temperature closely during low-heat phase. Remove from grill five degrees below target, then sear quickly over high heat.
Sweet Heat Rub
Balanced blend for pork and chicken with brown sugar base.
- Three parts brown sugar
- Two parts paprika
- One part chili powder
- One part garlic powder
- Salt and black pepper to taste
Bold Beef Rub
Robust seasoning for red meat and game.
- Two parts coarse black pepper
- Two parts kosher salt
- One part garlic powder
- One part onion powder
- Half part cayenne pepper
Herb Garden Blend
Fresh-tasting mixture for vegetables and fish.
- Two parts dried thyme
- Two parts dried oregano
- One part dried basil
- One part lemon zest powder
- Salt and white pepper
Grilling Techniques for Specific Foods

Different food categories require specialized grilling approaches. Understanding unique characteristics of proteins, vegetables, and other ingredients ensures optimal results.
Proper technique accounts for thickness, fat content, moisture level, and desired final texture. Adapting methods to specific foods demonstrates true grilling mastery.
These targeted strategies prevent common mistakes while maximizing flavor and texture potential. Success comes from matching cooking method to ingredient characteristics.
Perfect Steaks Every Time
Choose cuts at least one inch thick for proper crust development. Thinner steaks overcook before achieving good char marks.
Bring steaks to room temperature thirty minutes before grilling. Cold meat cooks unevenly with cold centers and overdone exteriors.
Season generously with coarse salt just before cooking. Fine salt dissolves too quickly and draws excessive moisture from surfaces.
Chicken and Poultry Guidelines

Start chicken skin-side down over medium heat for crispy skin development. Resist moving pieces until skin releases naturally from grates.
Monitor internal temperature carefully as chicken requires complete cooking. Breast meat reaches safe doneness at one hundred sixty-five degrees.
Bone-in pieces take longer than boneless cuts. Plan forty to fifty minutes for quarters and thighs versus fifteen to twenty for boneless breasts.
Seafood Grilling Success
Oil fish fillets generously before grilling to prevent sticking. Delicate flesh tears easily when adhered to grate surfaces.
Use fish basket or grill mat for flaky varieties that break apart. Salmon and halibut handle direct grate cooking better than sole or tilapia.
Cook shellfish quickly over high heat. Shrimp require only two to three minutes per side while scallops need similar brief cooking time.
Vegetable Grilling Methods

Cut vegetables into uniform pieces for even cooking across different types. Quarter bell peppers, halve zucchini lengthwise, and leave small items whole.
Brush vegetables with oil and season just before grilling. Early salting draws moisture and prevents proper browning.
Dense vegetables like potatoes and carrots benefit from par-cooking before grilling. Boil or microwave until barely tender, then finish on grill.
| Food Type | Ideal Temperature | Cooking Time | Internal Temp Target | Special Considerations |
| Beef Steak (1-inch) | 500-600°F direct | 8-10 minutes total | 130°F medium-rare | Rest 5 minutes before cutting |
| Chicken Breast | 350-400°F direct | 15-20 minutes | 165°F safe minimum | Pound to even thickness |
| Pork Chops | 400-450°F direct | 12-15 minutes | 145°F USDA safe | Brine for extra moisture |
| Salmon Fillet | 350-400°F direct | 8-12 minutes | 145°F opaque center | Skin-on prevents sticking |
| Bell Peppers | 400-450°F direct | 8-10 minutes | Not applicable | Char skin for easy peeling |
| Whole Chicken | 325-350°F indirect | 60-90 minutes | 165°F thigh meat | Spatchcock for faster cooking |
Upgrade Your Charcoal Grilling Arsenal
Discover premium charcoal grills and accessories designed for superior temperature control and versatility. From compact models to large smoker grill combinations, find equipment that matches your cooking ambitions.
Safety Practices and Grill Maintenance

Safe grilling practices protect people, property, and equipment. Following established safety protocols prevents accidents and injuries during outdoor cooking.
Regular maintenance extends grill lifespan while ensuring optimal performance. Clean equipment functions more efficiently and produces better-tasting food.
These essential habits become second nature with consistent practice. Responsible grill operation demonstrates respect for the cooking process and those around you.
Essential Safety Guidelines
Position charcoal grill at least ten feet from structures, overhangs, and flammable materials. Hot coals and sparks create fire hazards in confined spaces.
Never use charcoal grills indoors or in enclosed spaces. Carbon monoxide produced during combustion causes deadly poisoning without adequate ventilation.
Keep children and pets away from hot grill surfaces and cooking areas. Establish safety perimeter to prevent accidental contact with equipment.
Safe Grilling Habits
- Check grill stability before lighting fire
- Use long-handled tools to maintain distance from heat
- Keep fire extinguisher or water source nearby
- Wear protective gloves when handling hot components
- Allow coals to cool completely before disposal
- Clean grease buildup to prevent flare-ups
Dangerous Practices to Avoid
- Adding lighter fluid to burning coals
- Grilling in windy conditions without windbreak
- Leaving lit grill unattended
- Using gasoline or other inappropriate accelerants
- Disposing of hot ashes in combustible containers
- Grilling on wooden decks without protective mat
Regular Cleaning Procedures

Clean grill grates while still warm after each cooking session. Hot metal releases stuck food particles more easily than cold surfaces.
Empty ash catcher after grill cools completely. Accumulated ash restricts airflow and reduces temperature control effectiveness.
Deep clean entire grill quarterly including interior surfaces and vents. Remove grease buildup that causes flare-ups and affects flavor.
Component Inspection and Replacement
Check grate condition regularly for rust, warping, or coating damage. Replace compromised grates to maintain food safety and cooking performance.
Inspect ash catcher and bottom vents for proper function. Clear obstructions that restrict airflow and temperature control ability.
Examine grill body for cracks, rust-through, or structural damage. Address issues promptly to prevent further deterioration and safety hazards.
Proper Charcoal Storage
Store charcoal in dry location protected from moisture. Wet briquettes fail to ignite properly and produce inconsistent heat.
Keep charcoal bags sealed or transfer to airtight containers. Exposure to humidity reduces fuel quality and burning efficiency.
Rotate charcoal stock to use oldest fuel first. Extended storage can reduce effectiveness even under proper conditions.
- Allow grill to cool completely before cleaning interior surfaces
- Remove all grates, charcoal grate, and ash catcher components
- Scrape loose debris from interior walls using putty knife
- Vacuum ash and particles from bottom of grill body
- Wash removable parts with warm soapy water and brush
- Rinse thoroughly and dry completely before reassembly
- Apply light cooking oil coat to cast iron grates
- Check and clean all vents for unobstructed airflow
- Inspect hardware for rust and replace if necessary
- Cover grill with protective cover when not in use
Troubleshooting Common Charcoal Grilling Problems

Even experienced grillers encounter operational challenges during cooking sessions. Recognizing problems quickly and implementing solutions prevents ruined meals.
Most grilling issues stem from temperature control, fuel management, or equipment condition. Systematic troubleshooting identifies root causes rather than treating symptoms.
Understanding common problems and their fixes builds confidence and competence. These skills develop through experience and careful observation of grill behavior.
Temperature Won't Reach Desired Level
Insufficient charcoal quantity limits maximum achievable temperature. Add more fuel to heat zone and allow ten minutes for full ignition.
Closed or restricted vents choke oxygen supply needed for hot fire. Open bottom and top vents fully to increase airflow and temperature.
Ash buildup beneath charcoal restricts air circulation. Remove cooking grates and shake or redistribute coals to clear ash barrier.
Uneven Cooking Across Grill Surface
Poor charcoal distribution creates hot and cold spots. Rearrange coals into even layer or proper zone configuration for intended cooking method.
Damaged or warped grates cause uneven heat transfer to food. Replace compromised grates to restore proper cooking surface.
Wind blowing into vents disrupts temperature balance. Position grill to block prevailing wind or create windbreak barrier.
Excessive Flare-Ups During Cooking

Built-up grease on grates and in grill body ignites when drippings hit hot surfaces. Clean equipment thoroughly before cooking to prevent grease fires.
Extremely fatty meats produce excessive dripping that causes flames. Trim visible fat before grilling or use drip pan beneath food.
Move food temporarily to cooler zone when flare-ups occur. Allow flames to subside before returning items to direct heat.
Food Sticking to Grill Grates
Insufficient grate preheating prevents proper sear that naturally releases food. Heat grates for five full minutes before adding items.
Lack of oil on food surfaces increases sticking tendency. Brush lean proteins and vegetables with light oil coating before grilling.
Attempting to flip food prematurely causes tearing and sticking. Wait until meat releases naturally from grates before turning.
Advanced Charcoal Grilling Projects

Mastering fundamental techniques opens possibilities for ambitious grilling projects. Complex recipes challenge skills while delivering impressive results.
These advanced applications combine multiple methods within single cooking sessions. Success requires planning, timing, and confident execution of learned techniques.
Attempting challenging projects accelerates skill development and deepens understanding of charcoal grilling principles. The journey from beginner to expert unfolds through progressively difficult undertakings.
Low-and-Slow Brisket Smoking
Select whole packer brisket weighing twelve to fifteen pounds for optimal results. Trim excess surface fat to quarter-inch thickness while preserving fat cap.
Apply generous dry rub coating and refrigerate overnight. This allows salt penetration and bark development during extended smoking process.
Maintain steady two hundred twenty-five degree temperature for twelve to sixteen hours. Wrap brisket in butcher paper at one hundred sixty-five degrees internal temperature to push through stall phase.
Competition-Style Ribs

Remove membrane from bone side of spare ribs for better seasoning penetration. Square cuts into St. Louis style for uniform cooking.
Cook using three-two-one method - three hours unwrapped, two hours wrapped with liquid, one hour unwrapped with glaze. This produces tender ribs with excellent bark formation.
Apply thin sauce layers during final hour. Multiple light coats create glossy finish without burning sugar content.
Whole Hog Roasting
Ambitious whole hog projects require large capacity grill or custom pit setup. Plan for eighteen to twenty-four hours cooking time for one hundred pound pig.
Maintain two hundred fifty degree temperature using indirect heat configuration. Place drip pans beneath carcass to collect rendered fat.
Monitor multiple temperature points including shoulder, ham, and loin. Different sections reach doneness at varying times during cook.
Reverse-Seared Tomahawk Steaks

Season thick-cut tomahawk ribeyes and allow to reach room temperature. Set up two-zone fire with moderate indirect heat and blazing hot direct zone.
Cook steaks in indirect zone until internal temperature reaches one hundred fifteen degrees. This takes forty-five to sixty minutes depending on thickness.
Sear over highest heat for ninety seconds per side. This creates dramatic crust while raising internal temperature to perfect medium-rare.
Smoke Ring Science
The prized pink smoke ring results from chemical reaction between nitrogen dioxide and meat.
- Forms only during initial cooking hours
- Requires clean burning wood smoke
- Develops before bark formation
- Indicates proper smoking technique
- No impact on actual flavor
The Stall Phenomenon
Large meat cuts plateau at internal temperature around one hundred sixty degrees.
- Caused by evaporative cooling effect
- Can last several hours unaddressed
- Wrapping pushes through faster
- Texas crutch method uses foil
- Patience yields better bark
Bark Development
Flavorful crust forms through Maillard reaction and sugar caramelization.
- Requires surface dryness for formation
- Enhanced by rub sugar content
- Develops during unwrapped cooking
- Spritz application adds complexity
- Ultimate texture and flavor goal
Charcoal Grilling Compared to Other Methods

Understanding charcoal advantages and limitations helps make informed equipment decisions. Each grilling method offers distinct benefits for different cooking scenarios.
Charcoal grills excel at delivering authentic smoke flavor and versatility. The traditional approach connects modern cooks with centuries of fire-cooking tradition.
Comparing methods objectively reveals why many serious grillers maintain multiple equipment types. Different situations call for different tools.
Charcoal Versus Gas Grilling
Gas grills offer unmatched convenience with instant ignition and precise temperature control. Turn a knob and begin cooking within five minutes.
Charcoal grills require patience during startup but deliver superior flavor through wood smoke infusion. The combustion process creates taste complexity impossible with gas flames.
Fuel costs favor charcoal for occasional users but gas for frequent grillers. Propane convenience comes with ongoing tank refills or natural gas line installation.
Charcoal Smokers Versus Electric Smokers
Electric smokers provide set-and-forget operation ideal for beginners. Thermostat controls maintain consistent temperature without manual adjustment.
Charcoal smokers demand active fire management but reward with authentic smoke flavor. The hands-on process teaches fundamental skills while producing traditional results.
Smoke production differs between methods with charcoal creating genuine combustion smoke. Electric units rely on wood chips smoldering on heating element.
Pellet Grills and Charcoal Comparison

Pellet grills blend convenience of gas with smoke flavor approaching charcoal results. Automated auger feeds compressed wood pellets maintaining target temperature.
Charcoal grills produce more intense smoke flavor and achieve higher searing temperatures. Manual fire control provides hands-on experience pellet automation eliminates.
Operating costs slightly favor pellets over charcoal depending on local pricing. Both methods require electricity - pellets for auger operation, charcoal for optional electric starters.
| Feature | Charcoal Grill | Gas Grill | Electric Smoker | Pellet Grill |
| Startup Time | 15-20 minutes | 5 minutes | 10 minutes | 10-15 minutes |
| Temperature Control | Manual, skill-based | Precise knob control | Digital thermostat | Digital controller |
| Smoke Flavor | Excellent, authentic | Minimal to none | Good, less intense | Very good |
| Maximum Temperature | 700°F+ | 550-650°F | 275°F typical max | 500-550°F |
| Fuel Cost Per Hour | $1.50-$2.50 | $1.00-$1.50 | $0.50-$1.00 | $1.00-$2.00 |
| Portability | Excellent | Moderate with tank | Requires outlet | Requires outlet |
| Cleanup Difficulty | Moderate ash removal | Easy grate cleaning | Easy minimal ash | Moderate ash/grease |
Developing Your Charcoal Grilling Expertise

Skill development follows predictable progression from basic competence to advanced mastery. Deliberate practice combined with experimentation accelerates learning.
Each cooking session provides opportunities to refine techniques and expand capabilities. Successful grillers embrace failures as learning experiences rather than defeats.
Building expertise requires time, patience, and willingness to push beyond comfort zones. The journey itself becomes as rewarding as the delicious results.
Starting Your Learning Journey
Begin with simple recipes requiring basic direct grilling skills. Master burgers, hot dogs, and simple steaks before attempting complex projects.
Focus on temperature control fundamentals during initial cooking sessions. Understanding fire management provides foundation for all advanced techniques.
Keep detailed notes about charcoal quantities, vent settings, and timing. This record reveals patterns and helps troubleshoot future issues.
Intermediate Skill Development
Incorporate indirect cooking methods once direct grilling becomes comfortable. Roast whole chickens and pork shoulders to understand low-and-slow principles.
Experiment with different wood types to develop flavor preferences. Compare hickory, apple, cherry, and oak to understand their unique characteristics.
Practice temperature recovery after lid openings or weather changes. Learning to restore and maintain target heat builds confidence and control.
Advanced Technique Mastery

Attempt competition-level recipes requiring precise timing and temperature management. Brisket, ribs, and whole hog projects test cumulative knowledge.
Develop ability to cook multiple items with different requirements simultaneously. Managing various heat zones and timing demands advanced planning skills.
Create original recipes and techniques based on fundamental understanding. True mastery appears when confidently adapting methods to unique situations.
Continuous Improvement Strategies
Join online communities and local BBQ clubs to exchange knowledge. Learning from others' experiences shortcuts the discovery process.
Attend grilling competitions as spectator to observe expert techniques. Championship pitmasters demonstrate efficiency and precision worth emulating.
Experiment with new ingredients and methods regularly. Stagnation occurs when cooks stop exploring beyond familiar territory.
Practice Drill: The Perfectly Timed Multi-Cook
Challenge yourself by cooking an entire meal on charcoal grill with precise simultaneous completion. Plan menu with chicken requiring forty-five minutes, vegetables needing fifteen minutes, and buns warming for final five minutes. This exercise develops timing awareness and zone management skills essential for advanced grilling.
Mastering the Art of Charcoal Grilling

The art of charcoal grilling combines technical skill with intuitive understanding of fire and food. Mastering these techniques transforms outdoor cooking from simple meal preparation into rewarding craft.
Temperature control, smoke management, and cooking method selection work together creating exceptional results. Each element contributes to the distinctive flavor and experience that charcoal grilling delivers.
Success comes through consistent practice and willingness to learn from both victories and mistakes. Every cooking session builds knowledge and confidence for future grilling adventures.
The journey from beginner to expert griller unfolds one meal at a time. Embrace the process, enjoy the learning experience, and savor the delicious rewards of your developing expertise.
Start Your Charcoal Grilling Journey Today
Equip yourself with quality charcoal grills and accessories designed for exceptional performance. Explore our curated selection of smoker grill combinations, temperature control tools, and premium charcoal options that make mastering these techniques easier.
Your backyard awaits transformation into an outdoor kitchen where flavor, tradition, and skill combine. The power to create restaurant-quality dishes lies within reach through charcoal grilling mastery.