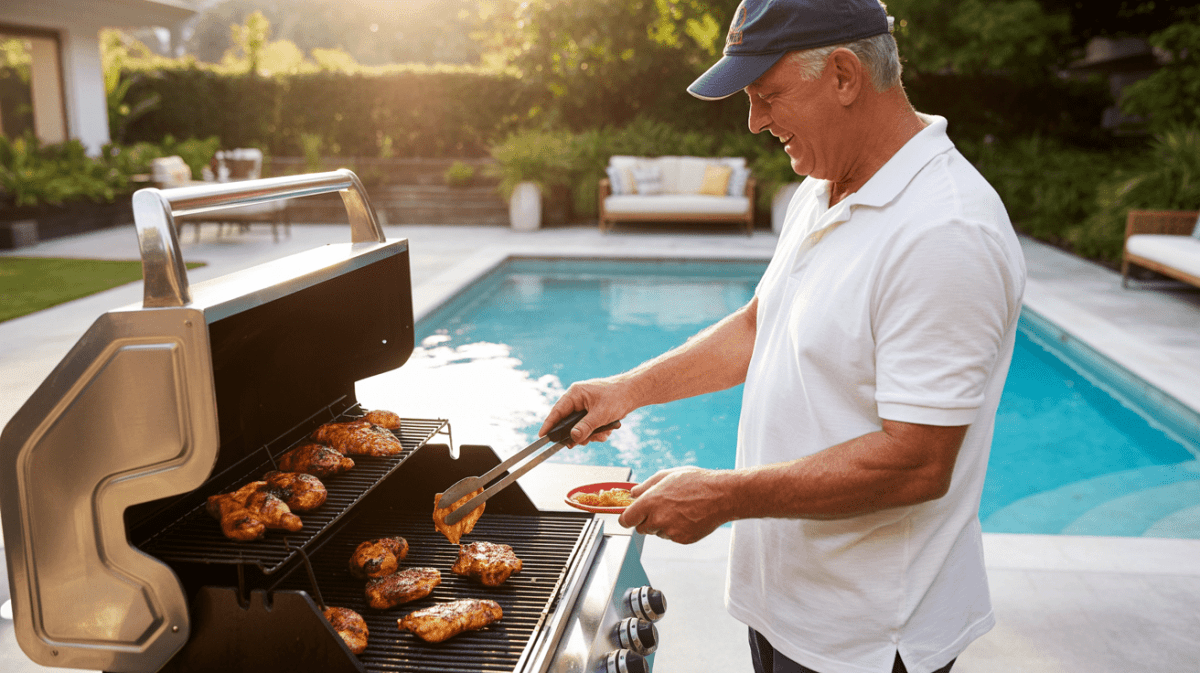
Grill your chicken to juicy perfection with this simple two-zone fire technique:
Grilling chicken can be tricky because it cooks unevenly and can dry out easily. The two-zone fire method gives cooks control over heat, making it easier to get juicy, well-cooked chicken every time. Using direct heat to sear and indirect heat to finish cooking ensures the chicken stays tender and fully cooked without burning.

This method splits the grill into a hot side and a cooler side. It lets the chicken get a nice crust over high heat, then slowly cook through over low heat. Knowing how to set up and manage this fire will help anyone grill chicken like a pro.
Mastering this technique not only improves the texture but also brings out richer flavors. It’s a simple skill that makes a big difference in outdoor cooking results.
Key Takeaways
- The two-zone fire uses both high and low heat for perfect cooking.
- Setting up the grill correctly is key to even grilling.
- This method keeps chicken juicy and flavorful.
Understanding the Two-Zone Fire Method
This method uses separate heat areas for different cooking tasks. It allows control over temperature and timing, helping to cook chicken perfectly without burning or drying it out.
What Is Two-Zone Grilling?
Two-zone grilling means arranging the coals or burners to create one hot side and one cooler side on the grill. The hot side is for searing and fast cooking. The cooler side is for slower, indirect cooking.
This setup lets the cook move food between zones based on how it is cooking. It is simple to set up and works on both charcoal and gas grills. This method helps manage flare-ups and uneven cooking.
Benefits for Grilling Chicken
Chicken often needs a mix of high heat to crisp skin and lower heat to cook inside without drying. The two-zone method provides this mix by allowing searing first on the hot side and then finishing over indirect heat.
It reduces the risk of burning the outside while the inside stays raw. It also offers more control over cooking time and temperature, producing juicier, more evenly cooked chicken every time.
How Two-Zone Fire Works
To create a two-zone fire, place coals or turn on burners on one side only. The direct heat side reaches temperatures of 400°F to 500°F or higher. The opposite side remains cooler, around 250°F to 300°F.
Start cooking chicken on the hot side to sear it. After a few minutes, move it to the cooler side to finish cooking through gently. This technique lets the chicken cook thoroughly while staying moist and avoiding burning.
Essential Equipment for Two-Zone Grilling

Two-zone grilling needs specific gear to control heat well and cook chicken evenly. The right grill, tools for measuring temperature, and the choice between charcoal or gas all affect the process.
Choosing the Right Grill
The best grill for two-zone cooking has at least two burners or areas to manage different heat levels. This allows one side to be hot for searing and the other cooler for slower cooking.
A grill with a lid is important because it traps heat and smoke, helping cook chicken evenly. Portable grills often lack this feature and may not work well for two-zone grilling.
Grills with adjustable air vents help control airflow and charcoal burning speed. This is key when using charcoal grills to maintain steady heat.
Recommended Thermometers and Tools
A good digital meat thermometer is essential to ensure chicken reaches a safe internal temperature of 165°F (74°C). Instant-read thermometers provide fast, accurate readings without cutting into the meat too much.
A grill thermometer built into the lid is helpful but not as precise for the chicken’s internal heat. A thermometer probe that can stay in the chicken while grilling makes it easier to watch temperature changes.
Other helpful tools include long-handled tongs, a grill brush to clean grates, and heat-resistant gloves for safety.
Charcoal vs. Gas Setup
Charcoal grills need careful arrangement of coals to create hot and cool zones. Charcoal is placed mostly to one side, leaving the other side empty or with fewer coals. This setup provides direct and indirect heat.
Gas grills use separate burners to create zones by turning one side on high and the other off or on low. Gas offers faster heat control and easier ignition but lacks the smoky flavor from charcoal.
Charcoal can be more challenging to manage but may add extra flavor to the chicken. Gas grills give more consistent temperature control and quick startup.
Setting Up the Two-Zone Fire
Mastering the two-zone fire means creating one area with high, direct heat and another with lower, indirect heat. He or she must arrange coals or burners carefully, control the temperature well, and know exactly where to place the chicken for perfect cooking.
Arranging Coals or Burners
Start by placing most of the coals on one side of the grill. This will be the direct heat zone where grilling happens fast. The other side should have few or no coals to create the indirect heat zone for slower cooking.
For gas grills, turn on only some burners on one side. Leave the rest off or low. This creates two different temperature zones.
This setup gives the chicken a chance to cook through slowly on the indirect side without burning. Once seared on the hot side, the chicken can finish cooking gently on the cooler side.
Heat Management Tips
Keep a grill thermometer handy to watch the temperature. The direct heat zone should be around 400-450°F for searing. The indirect zone stays at 300-350°F to cook evenly.
Add more coals or adjust burners to keep heat steady. Avoid opening the lid too often as it lets heat out. Use a spray bottle of water to control flare-ups from dripping fat.
Controlling airflow with vents also helps. Opening vents increases heat. Closing them lowers it. He or she should make small changes and wait a few minutes.
Identifying Direct and Indirect Zones
Direct heat is right above the coals or active burners—this area is hot and cooks food quickly. Indirect heat is on the cooler side, away from coals or burners, used for slow cooking.
Placing a hand 5 inches above the grill surface can help test heat. On the direct side, the hand should only last 2-3 seconds before it feels too hot. On indirect side, it should last 5-7 seconds comfortably.
Mark the grill with a small sign or reminder so it's easy to remember where each zone is while cooking. This prevents placing chicken in the wrong spot.
Grilling Chicken to Perfection
Grilling chicken well takes attention to preparation, cooking technique, and temperature control. Each step helps ensure juicy meat with a crisp outside and firms up the texture.
Prepping Chicken for the Grill
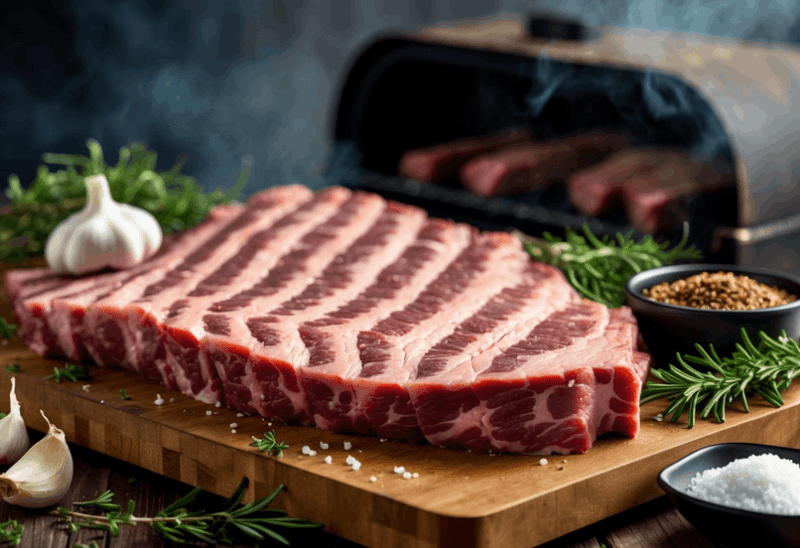
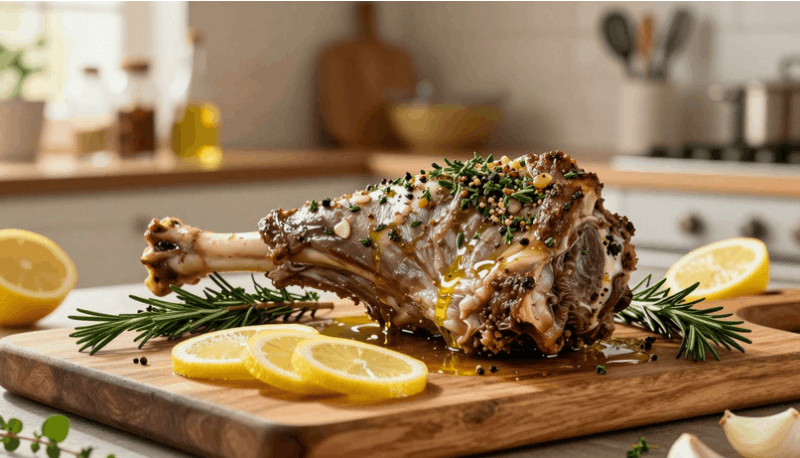
Proper preparation starts with choosing the right cuts. Bone-in, skin-on pieces retain moisture better during grilling. Trimming excess fat prevents flare-ups on the fire.
Marinating or seasoning is important. Use a simple mix of oil, acid (like lemon juice or vinegar), and spices. Let the chicken sit for at least 30 minutes to absorb flavors and to help tenderize the meat.
Pat chicken dry before grilling so the skin crisps properly. Oiling the grill grates and the chicken itself reduces sticking and helps get nice grill marks.
Achieving Even Cooking
Two-zone fire means one side is hot for searing, the other is cooler for slower cooking. Start by placing chicken on the hot side to brown and lock in juices.
Once seared, move the pieces to the cooler side. This lets heat penetrate without burning the outside. Turning chicken often ensures even cooking on all sides.
Close the grill lid frequently to keep heat consistent, but open to check and turn chicken as needed. Use tongs to avoid piercing meat and losing juices.
Monitoring Temperature
Internal temperature is the best way to know when chicken is done. Use a meat thermometer to check the thickest part without touching bone.
For safe eating, chicken should reach 165°F (74°C). Remove from heat at this point and let rest for 5 minutes. Resting helps juices redistribute to keep the meat moist.
Avoid guessing by time alone, as grill temperature and chicken size vary. Regular temperature checks prevent overcooking and dryness.
Expert Techniques for Flavor and Juiciness

Controlling flavor and moisture is key to great grilled chicken. Techniques like using the right marinades or rubs help add taste. Letting the chicken rest after grilling keeps it juicy and tender.
Using Marinades and Rubs
Marinades add flavor and tenderize meat before grilling. A good marinade often contains an acid like lemon juice or vinegar, oil, and seasonings. The acid breaks down muscle fibers, making chicken softer.
For best results, marinate chicken for at least 30 minutes. Avoid marinating more than 24 hours as acids can make the meat mushy.
Dry rubs are spice blends rubbed directly on the chicken. They create a flavorful crust when grilled. Common ingredients include paprika, garlic powder, salt, and black pepper.
Both methods can be combined. Apply a marinade first, then a dry rub before placing chicken on the grill.
Resting and Serving Chicken
Resting grilled chicken allows juices to redistribute. Without resting, cutting immediately will cause moisture to run out, making the meat dry.
Rest chicken for 5-10 minutes on a clean plate or cutting board. Cover loosely with foil to keep it warm without steaming.
Before serving, slice against the grain for tender bites. Use a sharp knife to avoid tearing the meat and losing juices.
Frequently Asked Questions
Mastering the two-zone fire requires understanding how to set up the grill, control temperatures, and handle different chicken cuts. Managing flare-ups and maintaining heat balance are key for even, safe cooking.
What is the two-zone grilling method and why is it effective for cooking chicken?
The two-zone grilling method uses one side of the grill for direct heat and the other for indirect heat. This allows chicken to brown over high heat and then cook through gently without burning. It helps avoid overcooking or charring while keeping the meat juicy.
Can you explain the setup of a charcoal grill for two-zone cooking?
In a charcoal grill, place hot coals on one side to create a direct heat zone. Leave the other side empty or with fewer coals for indirect cooking. This setup lets you move the chicken between hotter and cooler areas as needed.
How do you maintain consistent temperatures in both zones while grilling chicken?
Use the grill vents to control airflow, which impacts coal heat. Adjust vents to keep coals hot on the direct side and cooler on the indirect side. Add small amounts of charcoal if needed to maintain heat, and avoid opening the lid often to keep temperatures steady.
What are the ideal grill temperatures for the direct and indirect zones when grilling chicken?
The direct zone should be around 450°F to 550°F for searing the chicken. The indirect zone works best between 300°F and 350°F to finish cooking without burning.
How can you ensure even cooking of different cuts of chicken using a two-zone fire?
Start thicker or bone-in pieces in the indirect zone to cook through slowly. Move them to the direct zone briefly for browning. Thinner cuts can go on direct heat first, then move to indirect to avoid drying out.
What are some tips for managing flare-ups when using a two-zone grilling method?
Keep a spray bottle of water nearby to control flare-ups quickly. Trim excess fat from chicken to reduce drips that cause flames. Move food away from flames immediately if flare-ups get too large.
Grilling chicken can be tricky because it cooks unevenly and can dry out easily. The two-zone fire method gives cooks control over heat, making it easier to get juicy, well-cooked chicken every time. Using direct heat to sear and indirect heat to finish cooking ensures the chicken stays tender and fully cooked without burning.
This method splits the grill into a hot side and a cooler side. It lets the chicken get a nice crust over high heat, then slowly cook through over low heat. Knowing how to set up and manage this fire will help anyone grill chicken like a pro.
Mastering this technique not only improves the texture but also brings out richer flavors. It’s a simple skill that makes a big difference in outdoor cooking results.
Key Takeaways
- The two-zone fire uses both high and low heat for perfect cooking.
- Setting up the grill correctly is key to even grilling.
- This method keeps chicken juicy and flavorful.
Understanding the Two-Zone Fire Method
This method uses separate heat areas for different cooking tasks. It allows control over temperature and timing, helping to cook chicken perfectly without burning or drying it out.
What Is Two-Zone Grilling?
Two-zone grilling means arranging the coals or burners to create one hot side and one cooler side on the grill. The hot side is for searing and fast cooking. The cooler side is for slower, indirect cooking.
This setup lets the cook move food between zones based on how it is cooking. It is simple to set up and works on both charcoal and gas grills. This method helps manage flare-ups and uneven cooking.
Benefits for Grilling Chicken
Chicken often needs a mix of high heat to crisp skin and lower heat to cook inside without drying. The two-zone method provides this mix by allowing searing first on the hot side and then finishing over indirect heat.
It reduces the risk of burning the outside while the inside stays raw. It also offers more control over cooking time and temperature, producing juicier, more evenly cooked chicken every time.
How Two-Zone Fire Works
To create a two-zone fire, place coals or turn on burners on one side only. The direct heat side reaches temperatures of 400°F to 500°F or higher. The opposite side remains cooler, around 250°F to 300°F.
Start cooking chicken on the hot side to sear it. After a few minutes, move it to the cooler side to finish cooking through gently. This technique lets the chicken cook thoroughly while staying moist and avoiding burning.
Essential Equipment for Two-Zone Grilling
Two-zone grilling needs specific gear to control heat well and cook chicken evenly. The right grill, tools for measuring temperature, and the choice between charcoal or gas all affect the process.
Choosing the Right Grill
The best grill for two-zone cooking has at least two burners or areas to manage different heat levels. This allows one side to be hot for searing and the other cooler for slower cooking.
A grill with a lid is important because it traps heat and smoke, helping cook chicken evenly. Portable grills often lack this feature and may not work well for two-zone grilling.
Grills with adjustable air vents help control airflow and charcoal burning speed. This is key when using charcoal grills to maintain steady heat.
Recommended Thermometers and Tools
A good digital meat thermometer is essential to ensure chicken reaches a safe internal temperature of 165°F (74°C). Instant-read thermometers provide fast, accurate readings without cutting into the meat too much.
A grill thermometer built into the lid is helpful but not as precise for the chicken’s internal heat. A thermometer probe that can stay in the chicken while grilling makes it easier to watch temperature changes.
Other helpful tools include long-handled tongs, a grill brush to clean grates, and heat-resistant gloves for safety.
Charcoal vs. Gas Setup
Charcoal grills need careful arrangement of coals to create hot and cool zones. Charcoal is placed mostly to one side, leaving the other side empty or with fewer coals. This setup provides direct and indirect heat.
Gas grills use separate burners to create zones by turning one side on high and the other off or on low. Gas offers faster heat control and easier ignition but lacks the smoky flavor from charcoal.
Charcoal can be more challenging to manage but may add extra flavor to the chicken. Gas grills give more consistent temperature control and quick startup.
Setting Up the Two-Zone Fire
Mastering the two-zone fire means creating one area with high, direct heat and another with lower, indirect heat. He or she must arrange coals or burners carefully, control the temperature well, and know exactly where to place the chicken for perfect cooking.
Arranging Coals or Burners
Start by placing most of the coals on one side of the grill. This will be the direct heat zone where grilling happens fast. The other side should have few or no coals to create the indirect heat zone for slower cooking.
For gas grills, turn on only some burners on one side. Leave the rest off or low. This creates two different temperature zones.
This setup gives the chicken a chance to cook through slowly on the indirect side without burning. Once seared on the hot side, the chicken can finish cooking gently on the cooler side.
Heat Management Tips
Keep a grill thermometer handy to watch the temperature. The direct heat zone should be around 400-450°F for searing. The indirect zone stays at 300-350°F to cook evenly.
Add more coals or adjust burners to keep heat steady. Avoid opening the lid too often as it lets heat out. Use a spray bottle of water to control flare-ups from dripping fat.
Controlling airflow with vents also helps. Opening vents increases heat. Closing them lowers it. He or she should make small changes and wait a few minutes.
Identifying Direct and Indirect Zones
Direct heat is right above the coals or active burners—this area is hot and cooks food quickly. Indirect heat is on the cooler side, away from coals or burners, used for slow cooking.
Placing a hand 5 inches above the grill surface can help test heat. On the direct side, the hand should only last 2-3 seconds before it feels too hot. On indirect side, it should last 5-7 seconds comfortably.
Mark the grill with a small sign or reminder so it's easy to remember where each zone is while cooking. This prevents placing chicken in the wrong spot.
Grilling Chicken to Perfection
Grilling chicken well takes attention to preparation, cooking technique, and temperature control. Each step helps ensure juicy meat with a crisp outside and firms up the texture.
Prepping Chicken for the Grill
Proper preparation starts with choosing the right cuts. Bone-in, skin-on pieces retain moisture better during grilling. Trimming excess fat prevents flare-ups on the fire.
Marinating or seasoning is important. Use a simple mix of oil, acid (like lemon juice or vinegar), and spices. Let the chicken sit for at least 30 minutes to absorb flavors and to help tenderize the meat.
Pat chicken dry before grilling so the skin crisps properly. Oiling the grill grates and the chicken itself reduces sticking and helps get nice grill marks.
Achieving Even Cooking
Two-zone fire means one side is hot for searing, the other is cooler for slower cooking. Start by placing chicken on the hot side to brown and lock in juices.
Once seared, move the pieces to the cooler side. This lets heat penetrate without burning the outside. Turning chicken often ensures even cooking on all sides.
Close the grill lid frequently to keep heat consistent, but open to check and turn chicken as needed. Use tongs to avoid piercing meat and losing juices.
Monitoring Temperature
Internal temperature is the best way to know when chicken is done. Use a meat thermometer to check the thickest part without touching bone.
For safe eating, chicken should reach 165°F (74°C). Remove from heat at this point and let rest for 5 minutes. Resting helps juices redistribute to keep the meat moist.
Avoid guessing by time alone, as grill temperature and chicken size vary. Regular temperature checks prevent overcooking and dryness.
Expert Techniques for Flavor and Juiciness
Controlling flavor and moisture is key to great grilled chicken. Techniques like using the right marinades or rubs help add taste. Letting the chicken rest after grilling keeps it juicy and tender.
Using Marinades and Rubs
Marinades add flavor and tenderize meat before grilling. A good marinade often contains an acid like lemon juice or vinegar, oil, and seasonings. The acid breaks down muscle fibers, making chicken softer.
For best results, marinate chicken for at least 30 minutes. Avoid marinating more than 24 hours as acids can make the meat mushy.
Dry rubs are spice blends rubbed directly on the chicken. They create a flavorful crust when grilled. Common ingredients include paprika, garlic powder, salt, and black pepper.
Both methods can be combined. Apply a marinade first, then a dry rub before placing chicken on the grill.
Resting and Serving Chicken
Resting grilled chicken allows juices to redistribute. Without resting, cutting immediately will cause moisture to run out, making the meat dry.
Rest chicken for 5-10 minutes on a clean plate or cutting board. Cover loosely with foil to keep it warm without steaming.
Before serving, slice against the grain for tender bites. Use a sharp knife to avoid tearing the meat and losing juices.
Frequently Asked Questions
Mastering the two-zone fire requires understanding how to set up the grill, control temperatures, and handle different chicken cuts. Managing flare-ups and maintaining heat balance are key for even, safe cooking.
What is the two-zone grilling method and why is it effective for cooking chicken?
The two-zone grilling method uses one side of the grill for direct heat and the other for indirect heat. This allows chicken to brown over high heat and then cook through gently without burning. It helps avoid overcooking or charring while keeping the meat juicy.
Can you explain the setup of a charcoal grill for two-zone cooking?
In a charcoal grill, place hot coals on one side to create a direct heat zone. Leave the other side empty or with fewer coals for indirect cooking. This setup lets you move the chicken between hotter and cooler areas as needed.
How do you maintain consistent temperatures in both zones while grilling chicken?
Use the grill vents to control airflow, which impacts coal heat. Adjust vents to keep coals hot on the direct side and cooler on the indirect side. Add small amounts of charcoal if needed to maintain heat, and avoid opening the lid often to keep temperatures steady.
What are the ideal grill temperatures for the direct and indirect zones when grilling chicken?
The direct zone should be around 450°F to 550°F for searing the chicken. The indirect zone works best between 300°F and 350°F to finish cooking without burning.
How can you ensure even cooking of different cuts of chicken using a two-zone fire?
Start thicker or bone-in pieces in the indirect zone to cook through slowly. Move them to the direct zone briefly for browning. Thinner cuts can go on direct heat first, then move to indirect to avoid drying out.
What are some tips for managing flare-ups when using a two-zone grilling method?
Keep a spray bottle of water nearby to control flare-ups quickly. Trim excess fat from chicken to reduce drips that cause flames. Move food away from flames immediately if flare-ups get too large.
DISCLAIMER
This document is provided for general information purposes only and should not be relied upon as providing legal advice, technical, or specific operational guidance to the reader, whether as to the practices described in the document or the applicable legal requirements and regulations. backyardgrillingpros.com expressly disclaims any responsibility for liability arising from or related to the use or misuse of any information in this document.