How to Smoke a Brisket: Step-by-Step Guide to Perfect Results
You can turn a tough cut into tender, smoky brisket by controlling low heat, steady smoke, and patient timing.
Mastering temperature, a simple salt-and-pepper rub, and the right wrap will get you a juicy brisket with deep bark every time.

You’ll learn how to pick the best brisket, trim it for even cooking, and set up your smoker so heat and smoke stay steady.
Follow clear steps for handling the stall, choosing wood, and testing for doneness so you avoid common mistakes and finish with a reliable result.
Key Takeaways
- Pick and prep the right cut for even cooking.
- Maintain steady temps and use a simple rub for best bark and flavor.
- Wrap, rest, and slice correctly to keep the meat juicy.
Understanding Brisket Cuts

Brisket has two very different muscles and you need to know how each cooks, where fat sits, and what to buy for your plan.
Choosing the right cut and grade sets you up for even cooking, good bark, and sliceable results.
Brisket Anatomy: Point and Flat
The brisket is two muscles: the flat (leaner) and the point (fatter).
The flat sits toward the rib cage and is rectangular. It has less intramuscular fat and gives uniform slices when cooked to tenderness.
You’ll use the flat for lean, even cuts that are easy to portion.
The point lies on top of the flat and is thicker with more connective tissue and fat. It renders down and becomes pull-apart tender.
Use the point for chopped or burnt ends because its higher fat content keeps it moist during long cooks.
When trimming, leave a thin fat cap on the flat for protection and enough fat on the point so it doesn’t dry out.
Slice the flat against its grain and separate the point before slicing, since their grains run different directions.
Whole Packer vs. Flat Cuts
A whole packer brisket (also called full packer or packer brisket) includes both the point and flat together.
Buying a whole packer gives you more flexibility: you can smoke the whole muscle for a mix of slices and burnt ends, or trim and separate after resting.
A flat-only cut removes the point and sells smaller, faster-cooking pieces.
Flats are easier for beginners who want neat, uniform slices and predictable cook times. But flats dry out faster if overcooked because they have less marbling.
If you plan to feed a crowd or make burnt ends, choose a whole packer.
If you want tidy portions and shorter cook time, choose a flat. Size matters—a full packer often runs 10–16 pounds, while flats commonly sit in the 5–10 pound range.
Grading and Marbling
USDA grade relates to intramuscular fat—marbling—which affects flavor and tenderness.
USDA Choice brisket has more marbling than Select and will tolerate longer cooking with a juicier result.
Select grade brisket can work, but you must protect it with careful trimming, a fat cap, and steady low heat.
Look for even marbling across the flat and point. Marbling in the flat helps slicing; in the point it guarantees rich, fatty pockets that render into flavor.
Avoid briskets with large seams of hard fat or extreme uneven thickness; these create hot and cold spots during the cook.
When buying, feel for slight give in the package and check weight and thickness.
A well-marbled whole packer gives you the best margin for error and the most versatile end dishes.
If your budget limits you, choose Choice on the flat or buy a Select and plan to cook more gently.
Selecting and Preparing Your Brisket
Choose a flexible whole packer with a white fat cap about 1/4–1/2 inch thick and even thickness.
Trim away hard fat and silver skin, leave enough cap fat to protect the meat during the long cook, and have your trimming tools ready.
How to Choose the Best Brisket
Look for a full packer brisket between 10–16 pounds for even cooking.
The fat cap should be creamy white, not yellow, and about 1/4–1/2 inch thick; this renders during the cook and helps keep the meat moist.
Check flexibility by lifting the center—good briskets bend slightly.
Prefer USDA Choice or Prime if available; they have better marbling that tolerates long cooks.
Avoid briskets with large hard fat deposits or a stiff feel; that hard fat won’t render and makes chewing unpleasant.
If you only need lean meat, choose a flat-only cut, but expect faster cooking and less forgiveness.
How to Trim a Brisket
Start with a boning knife and trim the fat cap to roughly 1/4 inch thickness across the surface.
Remove any hard, waxy pockets of fat and the silver skin where it prevents smoke and rub from penetrating.
Round off thin edges and square corners so they don’t burn before the center finishes.
If the point and flat have different thicknesses, consider trimming thin flaps or doing a light shape to promote even cook.
Leave a thin layer of fat over the point to protect flavor. Work slowly with long, smooth strokes to avoid gouging the meat.
Tools for Trimming
Use a sharp boning or trimming knife (7–10 inches) for control and clean cuts.
A long slicing knife helps later, but for trimming you want a flexible, sharp blade to follow contours.
Keep a cutting board large enough for the whole packer and a tray for trimmed fat.
Use nitrile gloves for grip and hygiene. Have a thermometer on hand for later, and keep kitchen shears for removing stubborn bits.
If you’ll use a brisket recipe that calls for a binder, have mustard or oil ready to apply before seasoning.
Clean and dry your tools between tasks to maintain safety and a neat work area.
Seasoning and Rub Techniques

Seasoning starts with salt and pepper, adds layered spices, and benefits from a light binder to help the rub stick.
Apply evenly, let the rub rest on the meat for the right time, and use simple additions like Worcestershire for deeper beef flavor.
Brisket Rubs and Recipes
Keep the base simple: coarse kosher salt and coarsely ground black pepper.
That classic salt-and-pepper combo forms the bark and brings out beef flavor.
For a full brisket rub, try this balance:
- 2 tbsp kosher salt
- 2 tbsp coarse black pepper
- 2 tbsp smoked paprika
- 1 tbsp garlic powder
- 1 tbsp onion powder
- 1 tsp ground coriander
Mix and store in an airtight jar for up to 3 months.
Use about 1 tablespoon of the rub per pound of brisket for a noticeable but not overpowering crust.
You can tweak levels: more pepper for bite, more paprika for color, or add 1 tsp cumin for warmth.
If you prefer a no-smoke spice profile, swap smoked paprika for regular paprika.
For a hint of umami, brush a thin layer of Worcestershire sauce before applying a lighter dusting of rub.
Using Binders and Marinades
A binder helps rub adhere and form bark. Choose yellow mustard, neutral oil, or a thin Worcestershire glaze.
Mustard won’t flavor the meat strongly once cooked; it mainly holds the rub.
Apply a light, even coat of binder—just enough to make the surface tacky.
Then press the rub on with your hands so spices contact the fat and meat.
Don’t pile on; excess rub can burn and taste bitter.
Marinades are less common for smoked brisket because they don’t penetrate deeply.
If you use one, keep it short (2–6 hours) and avoid sugary marinades before long smokes; sugar can burn.
A quick Worcestershire-based spritz during cooking can boost beef notes without wetting the bark.
Timing and Application
Season at the right time for a dry-brine effect.
Apply rub 2 to 24 hours before smoking and refrigerate uncovered if time allows.
This helps salt draw moisture to the surface, then reabsorb, improving flavor and texture.
If you’re short on time, rub just before the smoker and let it rest at room temperature 30–60 minutes.
Pat excess moisture dry before smoking to encourage a crust.
Reapply a light sprinkle of rub after trimming or wrapping if you remove surface bark.
During the smoke, avoid heavy spritzing early on.
If you spritz, do it sparingly with a mix of water and Worcestershire or beef stock to add flavor without softening the bark.
Smoker Setup and Wood Selection

You’ll pick a smoker that fits your time, skill, and how much attention you can give the fire.
Then you’ll set it to hold steady heat and choose wood that adds beef-friendly smoke without bitterness.
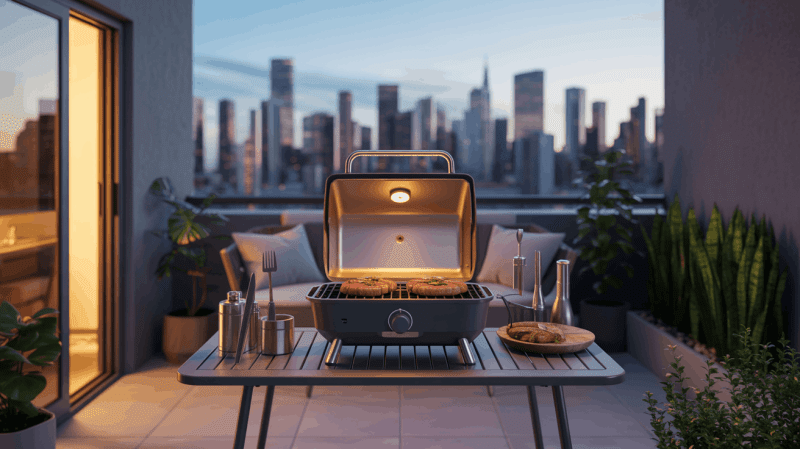
Choosing Your Smoker
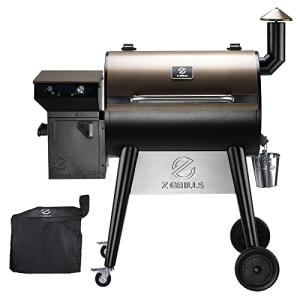
Select the smoker type that matches how hands-on you want to be.
An offset smoker gives you tight control over fire and smoke flavor but needs constant feeding and fire management.
A charcoal smoker like a Weber Smokey Mountain balances control and convenience; it holds temperature well and uses charcoal with wood chunks for smoke.
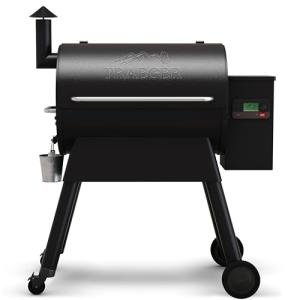
A pellet grill offers set-and-monitor ease with consistent temps, good for beginners or busy cooks.
Think about size and airflow.
Choose a smoker that fits the whole brisket flat and point without crowding.
Look for good seals, a reliable thermometer, and vents that let you control draft.
If you use an offset or charcoal smoker, plan where you will place a water pan to stabilize temps and add humidity.
For pellet grills, keep pellets dry and check the auger and firepot before long cooks.
Setting Up for Success
Start your smoker early and let it settle at 225–250°F before you even think about adding brisket. Trust a quality probe thermometer placed at grate level to check the real chamber temp—don’t just rely on the built-in dial.
Put the brisket fat-side up if your heat comes from below; the melting fat will baste the meat. For offset or charcoal smokers, shift coals to one side for indirect heat and drop a water pan between the fire and brisket to help even out temp swings.
Keep airflow dialed in so smoke stays thin and blue, not thick and white. White smoke screams incomplete combustion and will make the meat bitter—no thanks.
Add small wood chunks for charcoal or splits for offsets, but don’t overload the fire. Stick with steady fuel and water levels, and check temps every 30–60 minutes at first—less often once things settle.
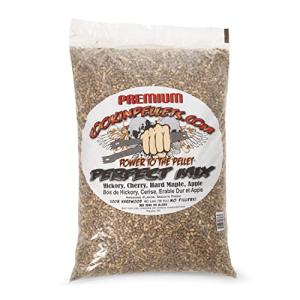
Optimal Wood Types
Pick woods that play nice with beef. Post oak is the Texas go-to: clean, medium smoke, solid bark, and it’s gentle enough for long cooks.
Hickory brings a stronger, sweeter smoke—try blending it with oak for more depth without getting harsh. Mesquite? Go easy. It burns hot and can taste bitter if you go overboard.
Skip mild fruit woods like apple or cherry for brisket—they’re better for pork or chicken. Match your wood form to your smoker: chunks or splits for charcoal and offset, pellets for pellet grills.
Chase that thin, blue smoke. If you spot heavy white plumes, back off the fuel or open up airflow.
Smoking Process: Temperature and Techniques
Keep your smoker steady, let bark build, and track internal temp through the stall. Use low heat, a simple rub, a little moisture now and then, and a probe to know when it’s time to wrap or rest.
Preparing the Brisket for Smoking
Trim the fat cap down to about 1/4 inch so the rub can hit the meat, but enough fat remains to render. Slice off any thick, hard fat and the silver skin underneath so everything cooks evenly.
Rub on kosher salt and coarse black pepper—press it in so it sticks. If you want to add extra spices, go light; too much sugar will burn during a long smoke.
Set the brisket fat side up if your heat’s below, or down if heat comes from above. Let it sit at room temp for 30–60 minutes before it hits the smoker to help avoid thermal shock.
What Temp to Smoke Brisket
Shoot for 225°F for most low-and-slow cooks. That sweet spot builds bark and keeps timing predictable.
You can bump it to 250°F if you’re in a hurry, but keep it steady. Use a solid smoker thermometer and a probe in the thickest part of the brisket. Internal finish temp should land between 195–205°F—collagen breaks down there and everything goes tender.
Remember carryover cooking: brisket can climb a few degrees after you pull it. If you’re planning a long rest in a cooler, pull closer to 195°F and let the residual heat finish the job.
Spritzing and Mopping
Give the brisket a light spritz with apple cider vinegar, diluted apple juice, or a thin stock every 45–90 minutes. Use a spray bottle—don’t soak it; a damp surface helps smoke stick but won’t cool the meat too much.
If you prefer, mop with a thin mix of vinegar or broth, but use it sparingly in the first 6–8 hours. Once you wrap (the Texas crutch), skip the mop.
Don’t use sugary mops late in the cook; sugar will just burn and mess up the bark. When you spritz, stand back and hit it with a quick burst, then let the smoker recover back to 225–250°F before closing the lid.
Managing the Stall
Brace yourself for the stall—usually around 150–165°F. Internal temp stops rising while collagen breaks down and moisture evaporates. It’s normal and can drag on for hours.
Wrap the brisket in pink butcher paper or foil (the Texas crutch) to push through the stall and keep things juicy. Paper keeps some bark; foil speeds things up but softens the crust more.
Go by feel: start probing every 30–60 minutes once you hit 150°F. When the probe slides in like butter and internal temp reads 195–205°F, unwrap and hold if you want to finish the bark.
Keep smoker temp steady through the stall—big swings just make it last longer. Patience and steady heat are your friends for tender brisket and a dark, tasty bark.
Wrapping and Finishing the Brisket
Wrap brisket when internal temp hits about 165–170°F and you’ve got a dark, firm bark. Pick your wrap based on what you want—bark and texture, or speed and juiciness.
How to Wrap a Brisket
Move quickly but carefully with hot brisket. Tear off two big sheets of your chosen wrap and overlap them for full coverage.
Set the brisket fat-side up near the edge, then fold the bottom tightly over to get rid of air pockets. Fold the sides in like a burrito, tucking as you roll. Go for a snug, even wrap with the seam on the bottom so juices don’t pool on top.
If you want extra moisture, add 2–4 tablespoons of beef broth or melted tallow before the last fold. Spread it out before sealing up.
Put the wrapped brisket back in the smoker, fat-side up. If you use foil, check temp more often—foil cooks hotter. Stick a probe through the wrap to monitor progress without unwrapping.
Butcher Paper vs. Foil
Butcher paper (pink peach paper) breathes and helps keep a firmer bark. It slows heat gain a bit, so cook time’s a little longer. The paper soaks up some fat, which helps preserve texture while still keeping things moist.
Use food-grade BBQ paper and practice folding tight—no gaps. Foil seals in steam and speeds you through the stall. It cooks faster and turns out super-tender meat, but the bark will be softer.
Double up heavy-duty foil to avoid leaks, and crimp edges tight. Go with foil if you’re in a hurry or want max juiciness; pick butcher paper if you’re after a crustier bark and more smoke flavor.
Resting, Slicing, and Serving
Let the meat rest to hold juices, spot the grain, and decide how you’ll serve the flat and point. Resting keeps brisket juicy; slicing right shows off the texture; cubing the point gives you those rich burnt ends.
How Long to Rest Brisket
Rest at least 45 minutes—an hour or two is even better for a whole packer. Wrap it in butcher paper or foil, then bundle in a towel and drop it in a cooler (no ice) to hold heat without overcooking.
Internal temp can climb 5–10°F during rest. That’s when collagen finishes breaking down and the meat turns tender. Need to hold it longer? Keep it wrapped in the cooler for up to 4 hours safely. Don’t cut early or you’ll lose all those juices on the board.
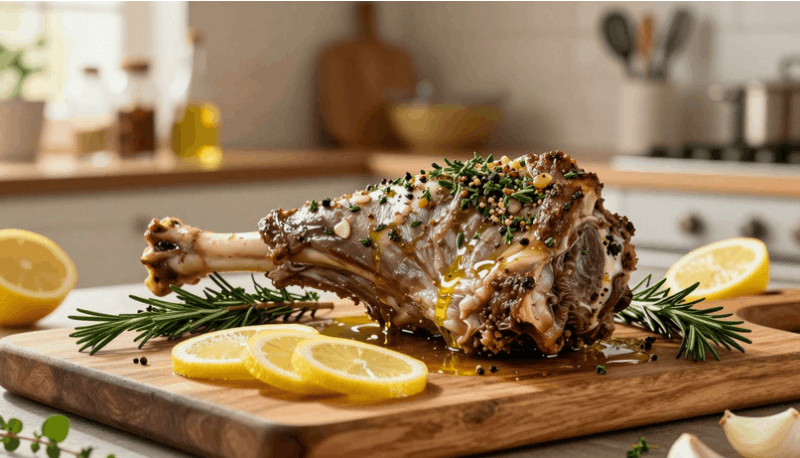
Slicing Against the Grain
Find the grain by looking for the long muscle fibers on the flat and point—they run in different directions. Make sure you spot both before you start cutting.
Slice across the grain so each bite stays tender. Use a long, sharp carving or slicing knife (10–12 inches) for smooth cuts. Cut the flat into 1/4–1/2 inch slices, then turn the point and slice or cube for burnt ends. Keep slices even and let the knife do the work.
Serving and Burnt Ends
Serve slices from the flat for lean, uniform pieces. Put thicker slices toward the center so folks can trim or grab what they like.
Offer juices or a light sauce on the side—don’t drown the bark. For burnt ends, cube the point, toss with sauce, and return to heat until caramelized. These bites are fatty, rich, and perfect for sliders or just grabbing off the tray. Label the cuts so people know what’s what.
Essential Tools and Thermometers
You need solid temp readings and sharp knives to nail doneness and keep the brisket looking good. Pick thermometers that track both smoker and meat temps, and knives that slice clean without shredding bark.
Meat Thermometers
Use a dual-probe thermometer to watch both chamber and brisket at the same time. Put one probe in the thickest part of the flat and the other in the smoker near the fire. This keeps you in the 225–275°F zone and means you won’t be opening the smoker all day.
Keep an instant-read like the Thermapen handy for final checks. The Thermapen One or similar gives fast, accurate readings in under a second, so you can test several spots quickly.
For long cooks, use a leave-in probe that logs temps or sends wireless alerts so you can spot stalls and trends. Buy probes that can handle high heat and swap out frayed wires. Calibrate in ice water or boiling water if you think readings are off.
Stick one probe in the flat and, if you can, another in the point to avoid surprises like tough or overcooked spots.
Knives and Accessories
Grab a long slicing knife (at least 12") with a thin, stiff blade for single-stroke cuts. Granton-edge or hollow-ground blades help keep slices neat and reduce sticking.
Keep a separate boning or trimming knife for prep. Use heavy-duty butcher paper or foil for wrapping, depending on the bark you want. Butcher paper keeps bark firmer; foil speeds things up and locks in moisture.
Have nitrile gloves, a sturdy cutting board, and a long spatula or tongs to move brisket without tearing it up. A good digital thermometer, a sharp 12" slicer, and proper wrap are the core kit. For more on thermometers, check this guide to smoking brisket temperatures.
Leftovers and Reheating
Keep brisket moist by reheating slowly and storing it right away. Add a splash of beef broth or saved juices when warming, and leave whole pieces uncut until serving to keep more moisture in.
How to Reheat Brisket
Reheat brisket at a low temperature until the internal temp hits 165°F. For a whole or large piece, set your oven to 300–325°F.
Put the brisket in a roasting pan and add 1/2–1 cup beef broth or drippings per pound. Seal it tightly with foil to trap steam.
Use a probe thermometer so you can stop heating right when it gets to 165°F. For sliced brisket, grab a heavy skillet and warm it on the stovetop.
Pour in enough beef broth or barbecue sauce to cover the bottom of the pan. Set the heat to low, cover, and stir gently until the slices warm up evenly.
For large pieces, a slow cooker on LOW for 2–4 hours works pretty well. Just include any juices and set the lid in place.
Don’t use the microwave unless you’re desperate—it really dries out brisket. If you must, microwave briefly with a damp paper towel and check often.
Storage Tips
Wrap brisket tightly and get it in the fridge within two hours of cooking. Use heavy-duty foil or an airtight container, and pour in any juices to help keep it moist.
Store in the fridge for up to four days, or freeze for up to three months for best results. If you’re freezing, double-wrap: first in plastic wrap, then in foil or a freezer bag.
Thaw brisket in the fridge for 24–48 hours before reheating. Try to keep it whole until you’re ready to serve—slice only after reheating so you don’t lose those juices.
Frequently Asked Questions
Here’s a quick rundown of the stuff people always ask: rub ratios, smoker temps, how to check doneness, pellet grill and charcoal setup, and the mistakes that can ruin your brisket.
What’s the best rub recipe and how much should I apply to brisket?
Stick with a simple 50/50 mix of coarse black pepper and kosher salt for that classic Texas-style bark. For a 10–12 lb brisket, use about 3–4 tablespoons of rub per pound so you cover the surface well.
If you want to mix it up, add 1 tablespoon per cup of rub—try 2 tbsp granulated garlic and 1 tbsp onion powder. You can put the rub on right before smoking or let it sit overnight in the fridge (uncovered) for a drier surface and better bark.
(For a basic reference on Texas-style seasoning, see this Texas-style guide: https://bbqreport.com/how-to-smoke-brisket/.)
What smoker temperature is best for brisket: 180°F, 225°F, or 250°F?
225°F is the sweet spot for low-and-slow. It balances bark, smoke, and breaks down connective tissue without drying things out.
Cooking at 250°F speeds things up by 10–25%, but you’ll need to watch out for the stall and softer bark. 180°F is just too low—brisket takes forever and might never break down right.
How long should I smoke a brisket per pound, and when is it actually done?
Figure on 1 to 1.5 hours per pound at 225°F, but it really depends on your smoker and the brisket itself. A 10–12 lb brisket usually takes 10–18 hours, depending on the stall.
Forget the clock. Use the probe test: slide a thin thermometer or skewer into the thickest part of the flat. If it goes in with no resistance—like soft butter—you’re good, usually at 195–205°F inside.
(For timing tables and stall explanation, this practical guide is useful: https://halfacowclub.com/guides/how-to-smoke-a-brisket.)
How do I smoke a brisket on a pellet grill or Traeger for consistent results?
Set your pellet grill to 225°F and let it preheat for at least 30 minutes. Use a coarse, beef-friendly pellet like oak or hickory, and keep the hopper full so you don’t run out mid-cook.
Put the brisket fat-side up. Monitor both the pit and meat temps with two probes, and wrap the brisket in butcher paper around 160–170°F if you hit a long stall. Wi‑Fi or Bluetooth thermometers are handy so you don’t have to keep opening the lid.
How do I smoke a brisket on a charcoal grill and maintain steady heat?
Build a two-zone fire: pile coals on one side, brisket on the other. Set a water pan on the cool side to help keep temps steady.
Add more coals and wood chunks every 45–90 minutes to hold 225°F. Adjust the vents to tweak the heat—open for hotter, close a bit to cool it down. Always track both grill and meat temps with probes, not just guesses.
What common mistakes should I avoid when smoking a brisket?
Don’t just watch the clock. Instead, grab a probe and check the internal temp—trust your tools and instincts.
People often trim off too much of the fat cap. That’s a fast way to end up with dry, sad brisket.
Slicing too thick? Yeah, that dries it out too. Thin, even slices hold onto the juices better.
Try not to keep opening the smoker. Every peek drops the temperature and drags out your cook.
It’s tempting to pull the brisket when the internal temp plateaus, but hang in there. Wait for that buttery, probe-tender feel.
And please, don’t rush the resting step. Let it chill, wrapped up in a cooler, for at least an hour—up to four’s even better. That’s when the magic happens and the juices settle back in.